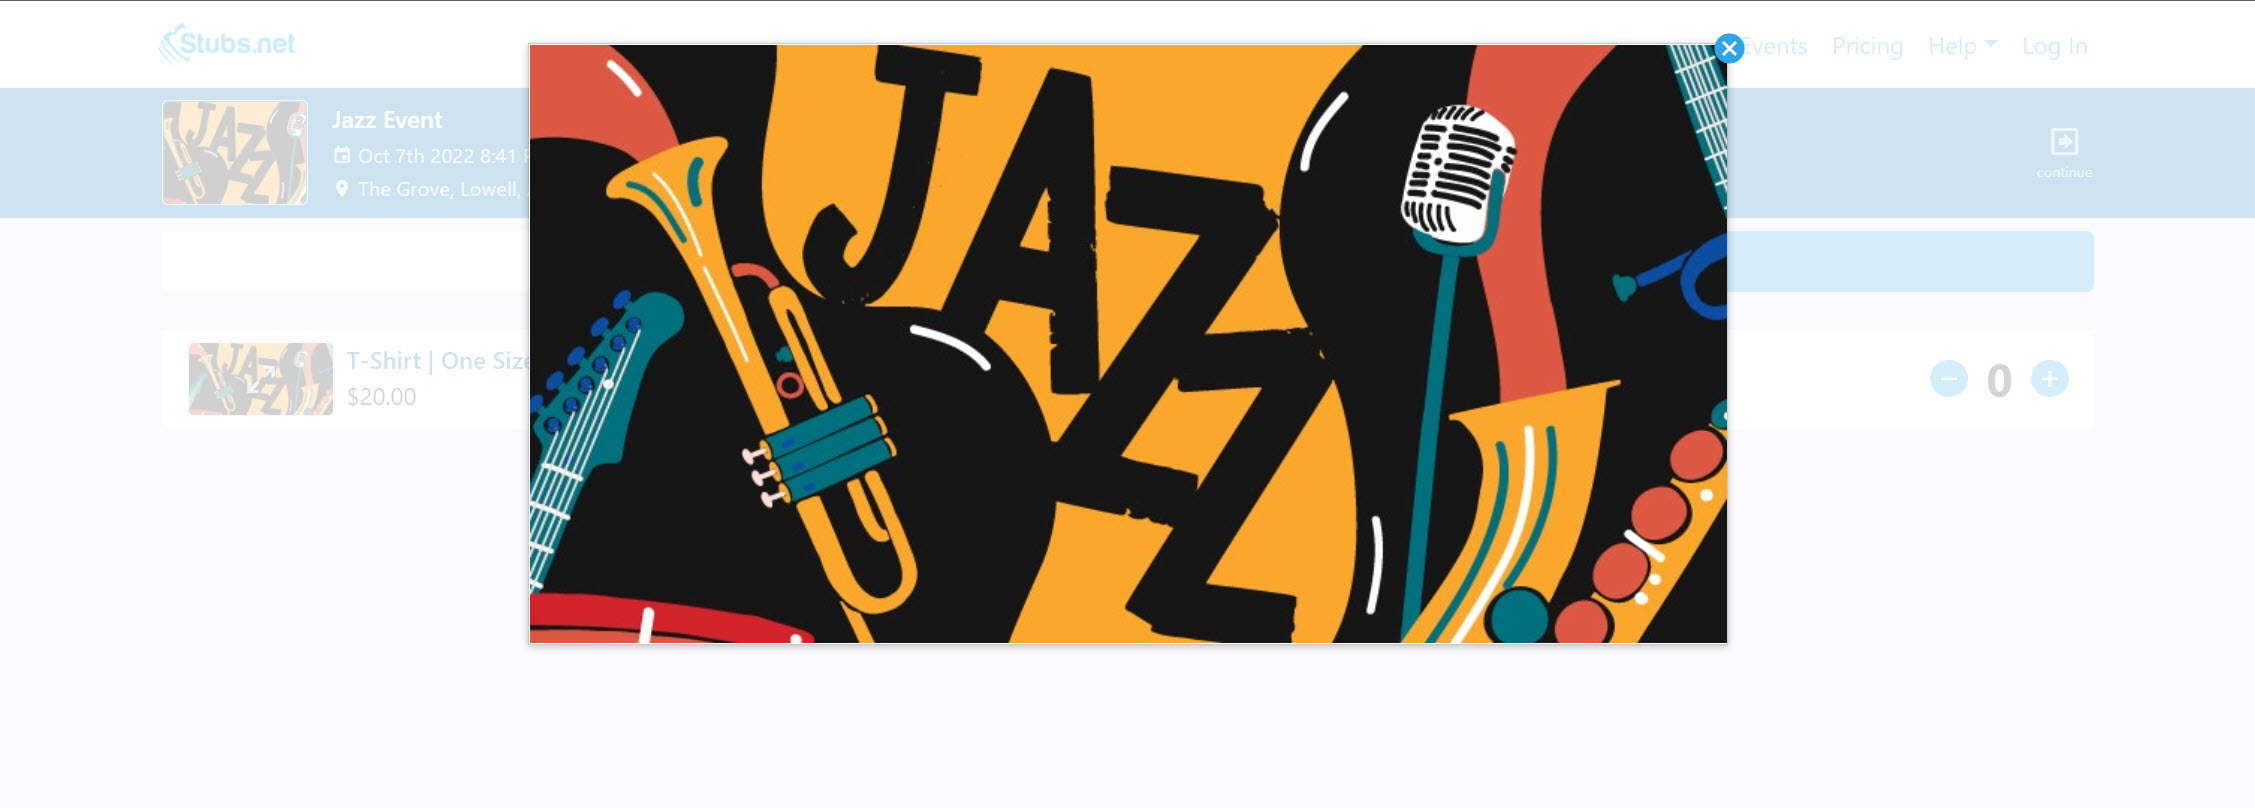
Ticket Images
a. You can now upload images that can be associated with specific tickets.
b. You can upload multiple images, but you can only tag one image per ticket.
1. Under Event Images in the event setup process, upload an image where it says Ticket Images. Name and crop the image as you normally would.
2. Click on Add Ticket Image to upload additional images.
Pro Tip
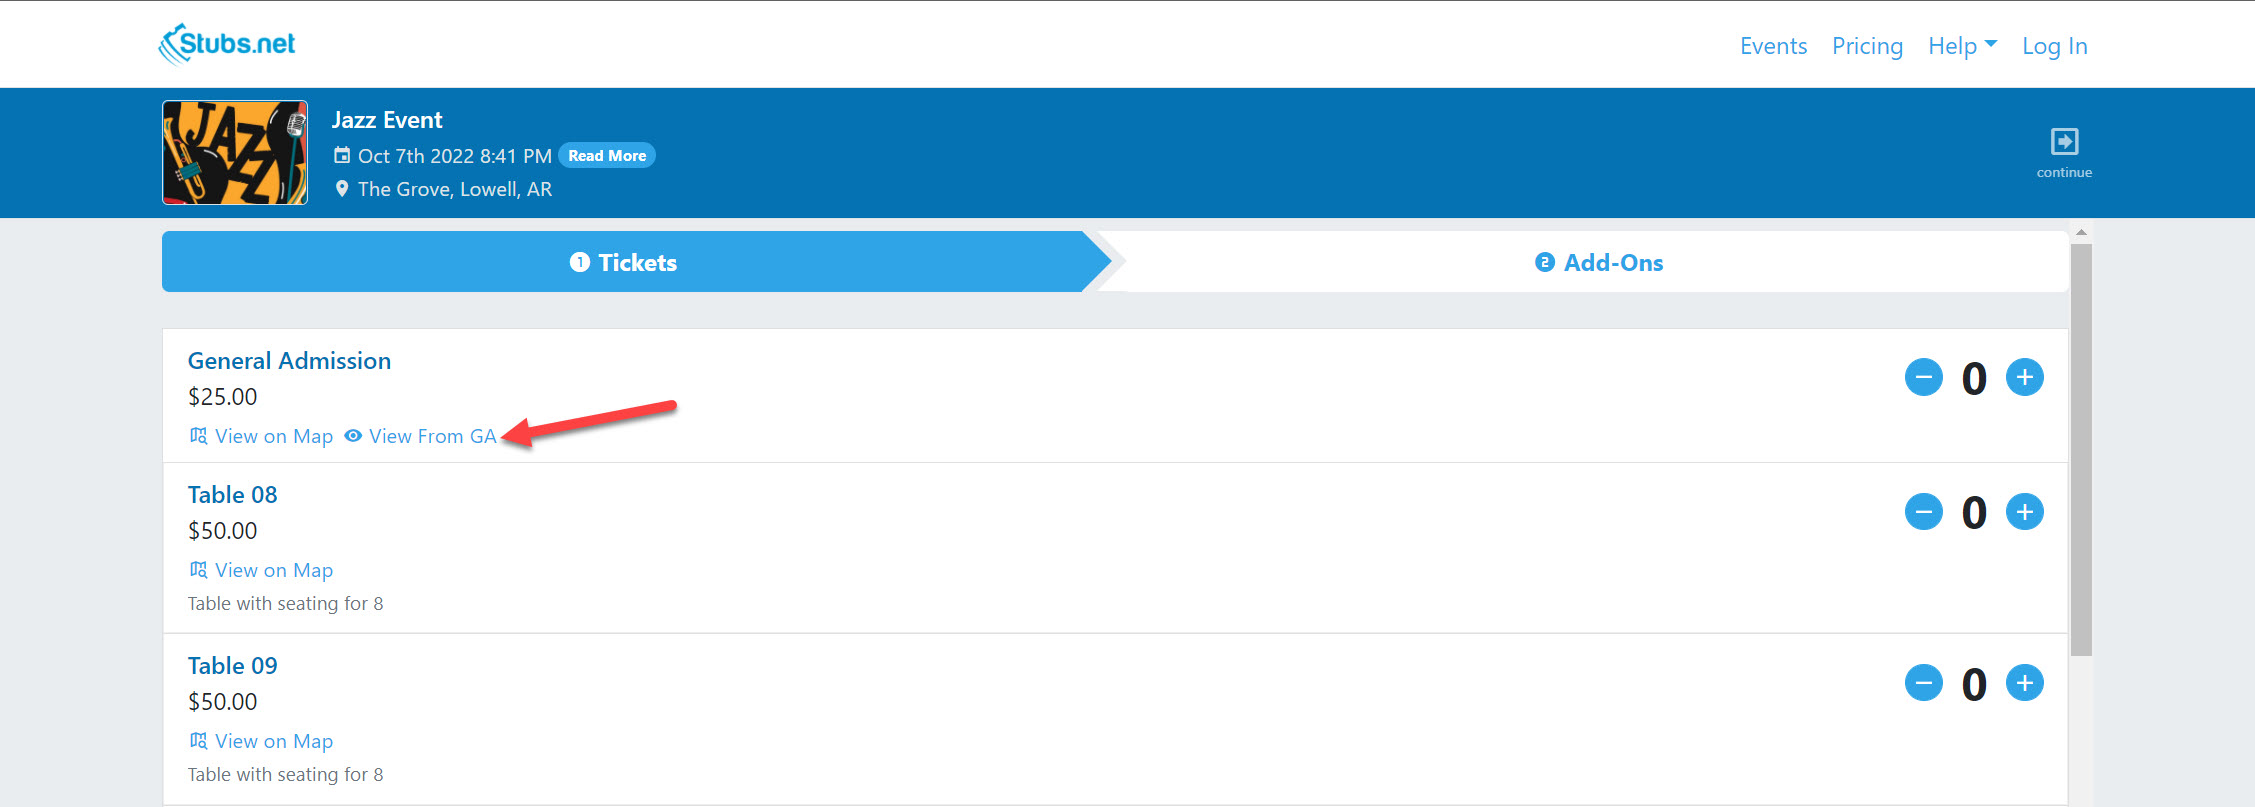
The name you give the image will be displayed as the text link for viewing the image. Name this something that provides customers with the intended context.
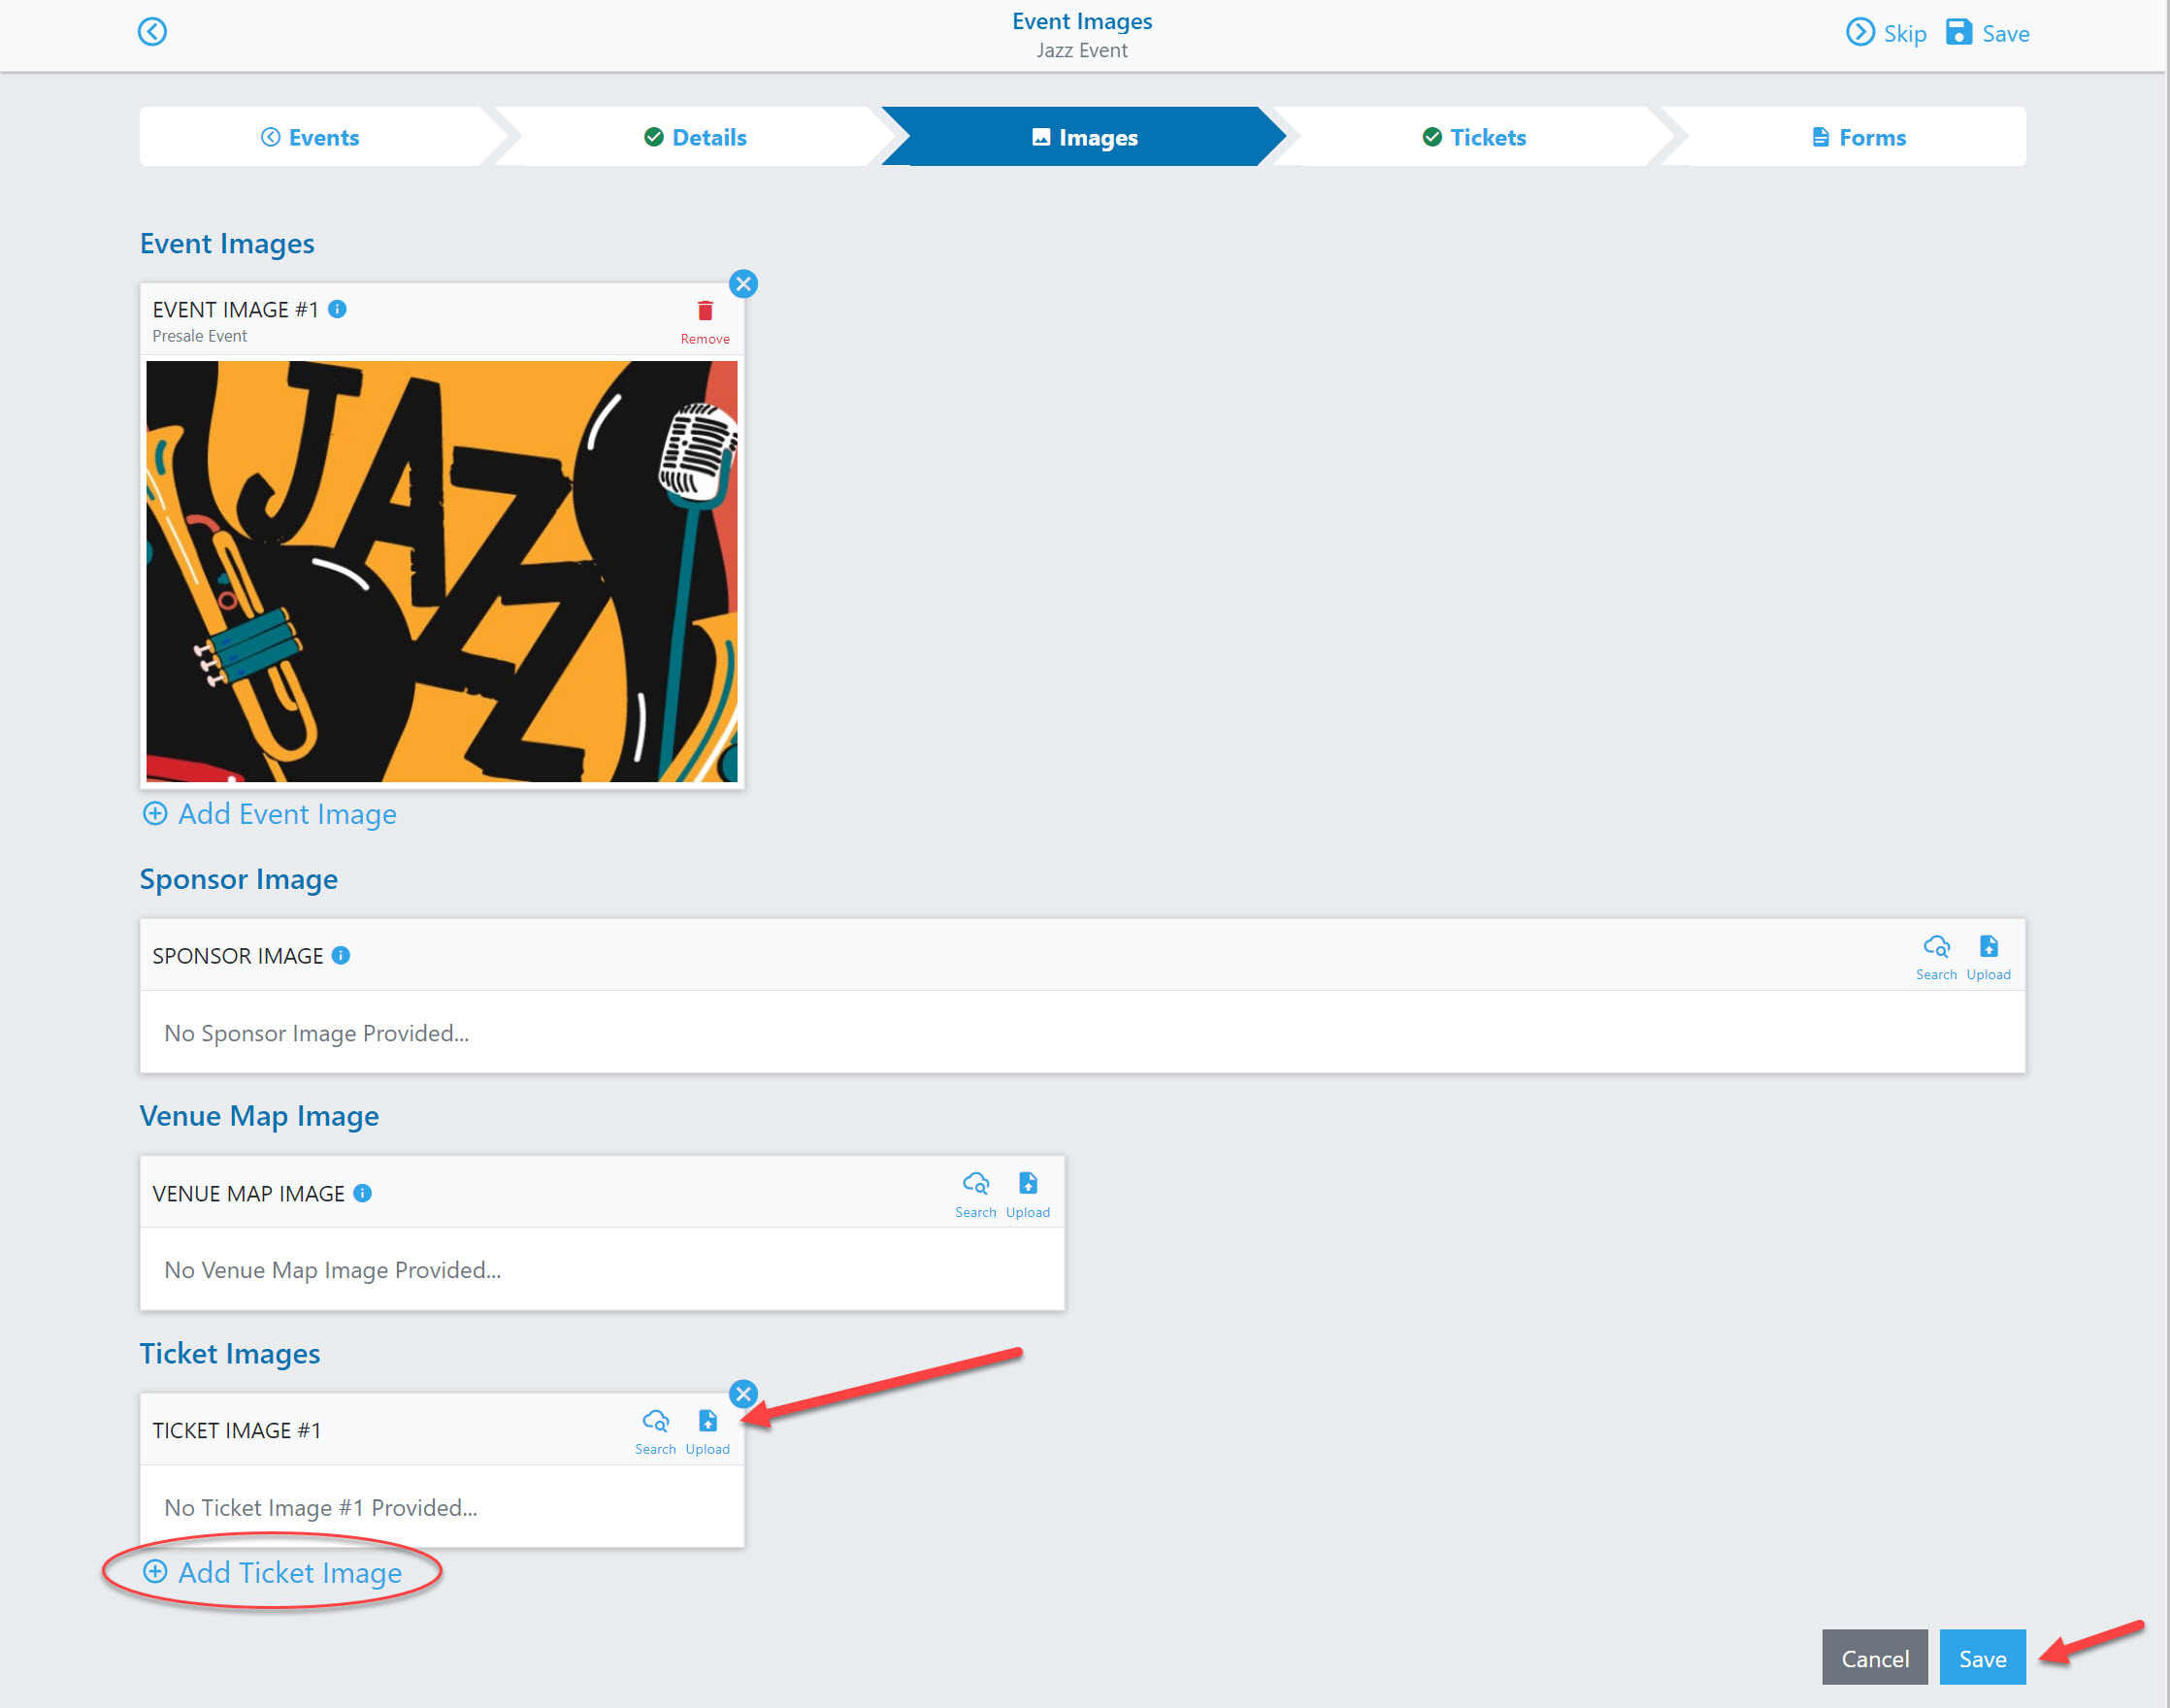
3. After uploading your images and clicking Save, you’ll be directed to the Ticket setup page.
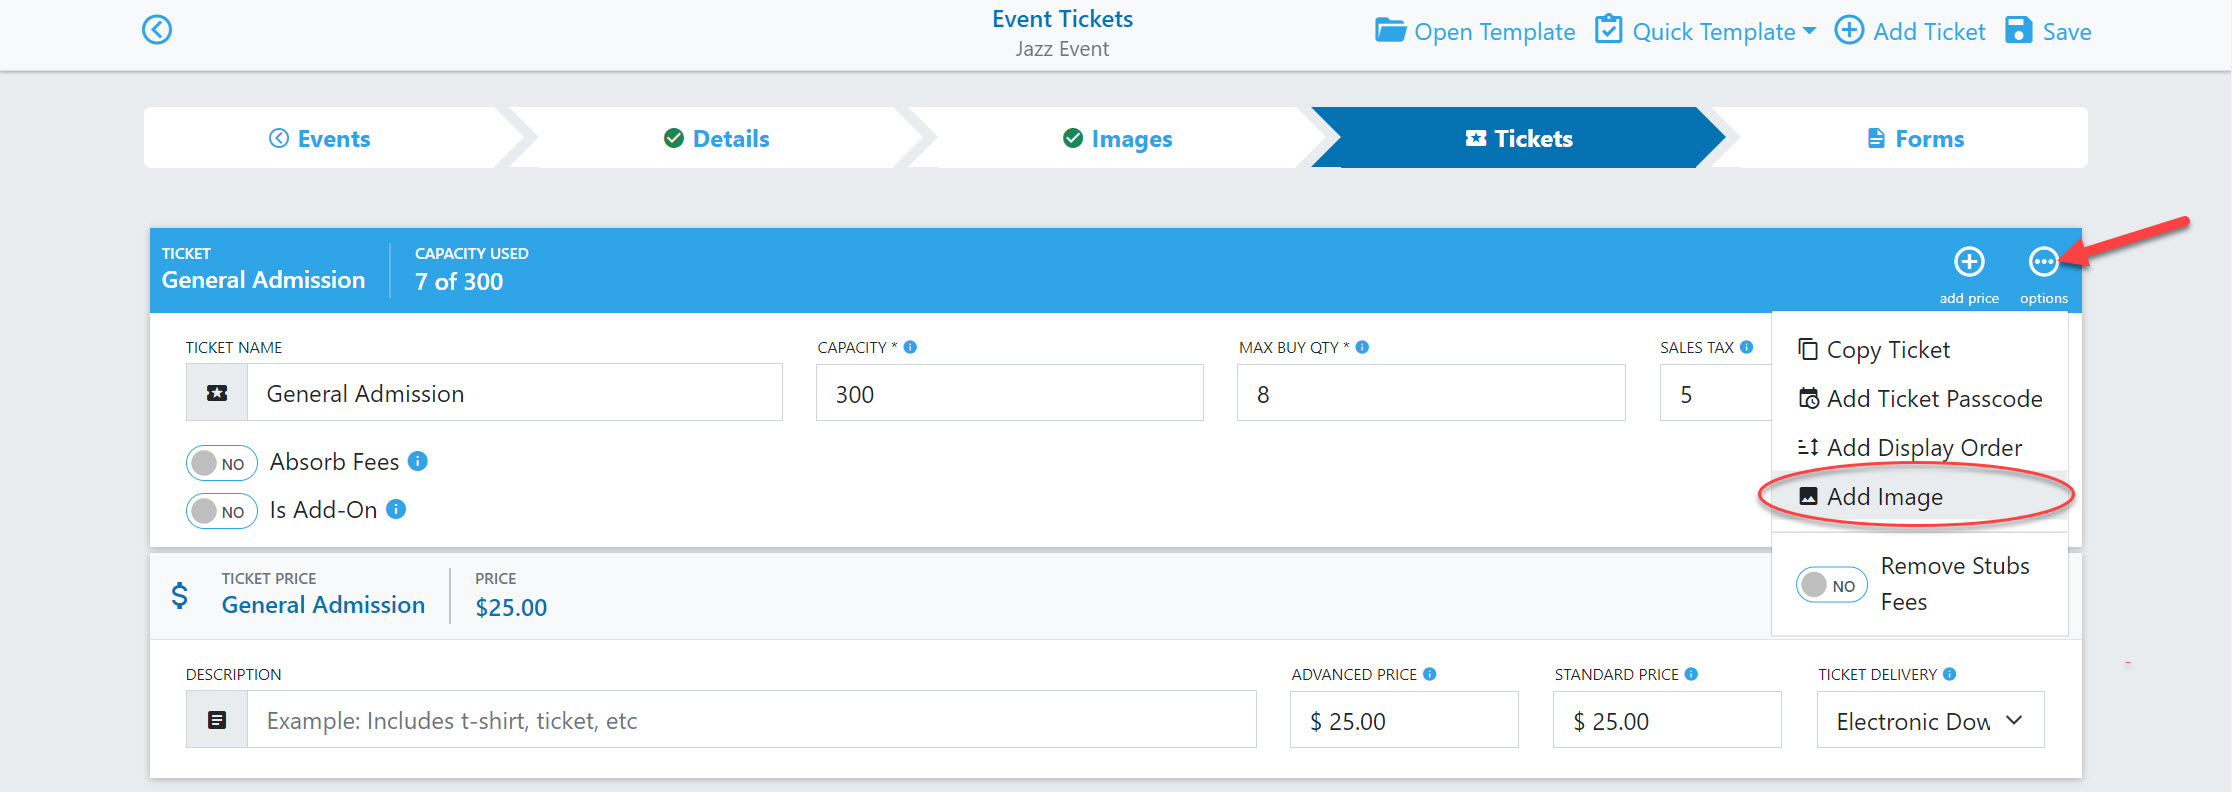
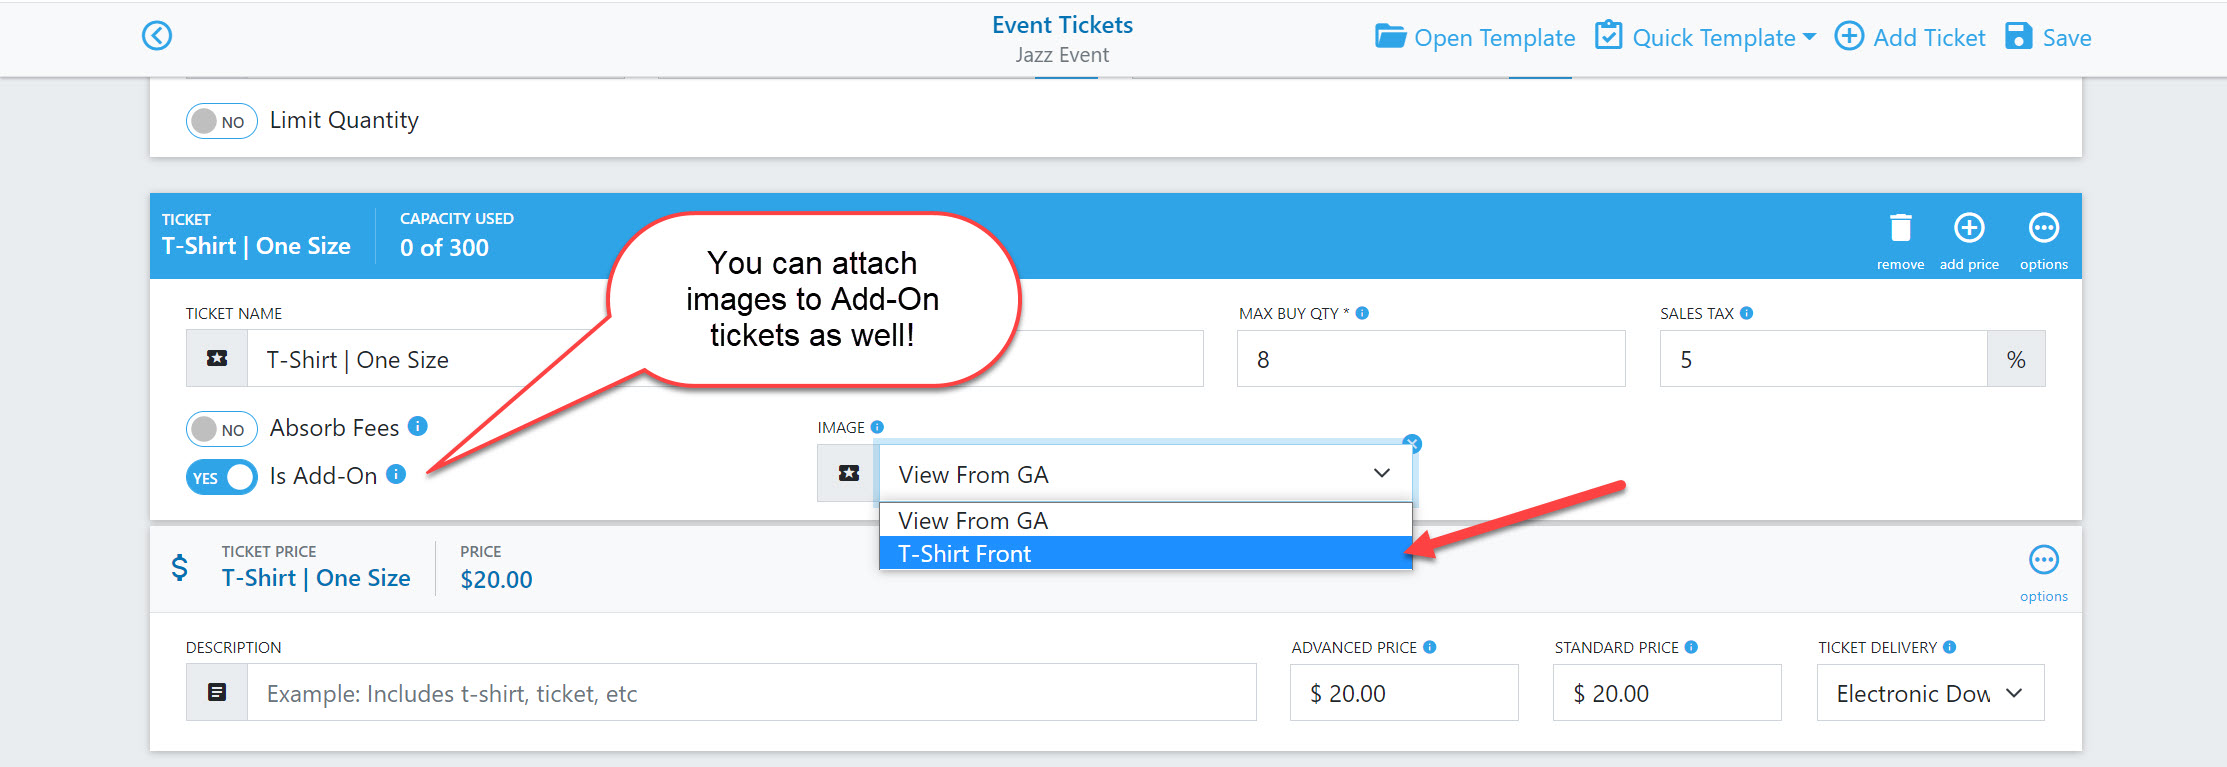
4. Under Options, select Add Image. A drop-down box will appear, and you will select the image that you want to associate with that ticket.
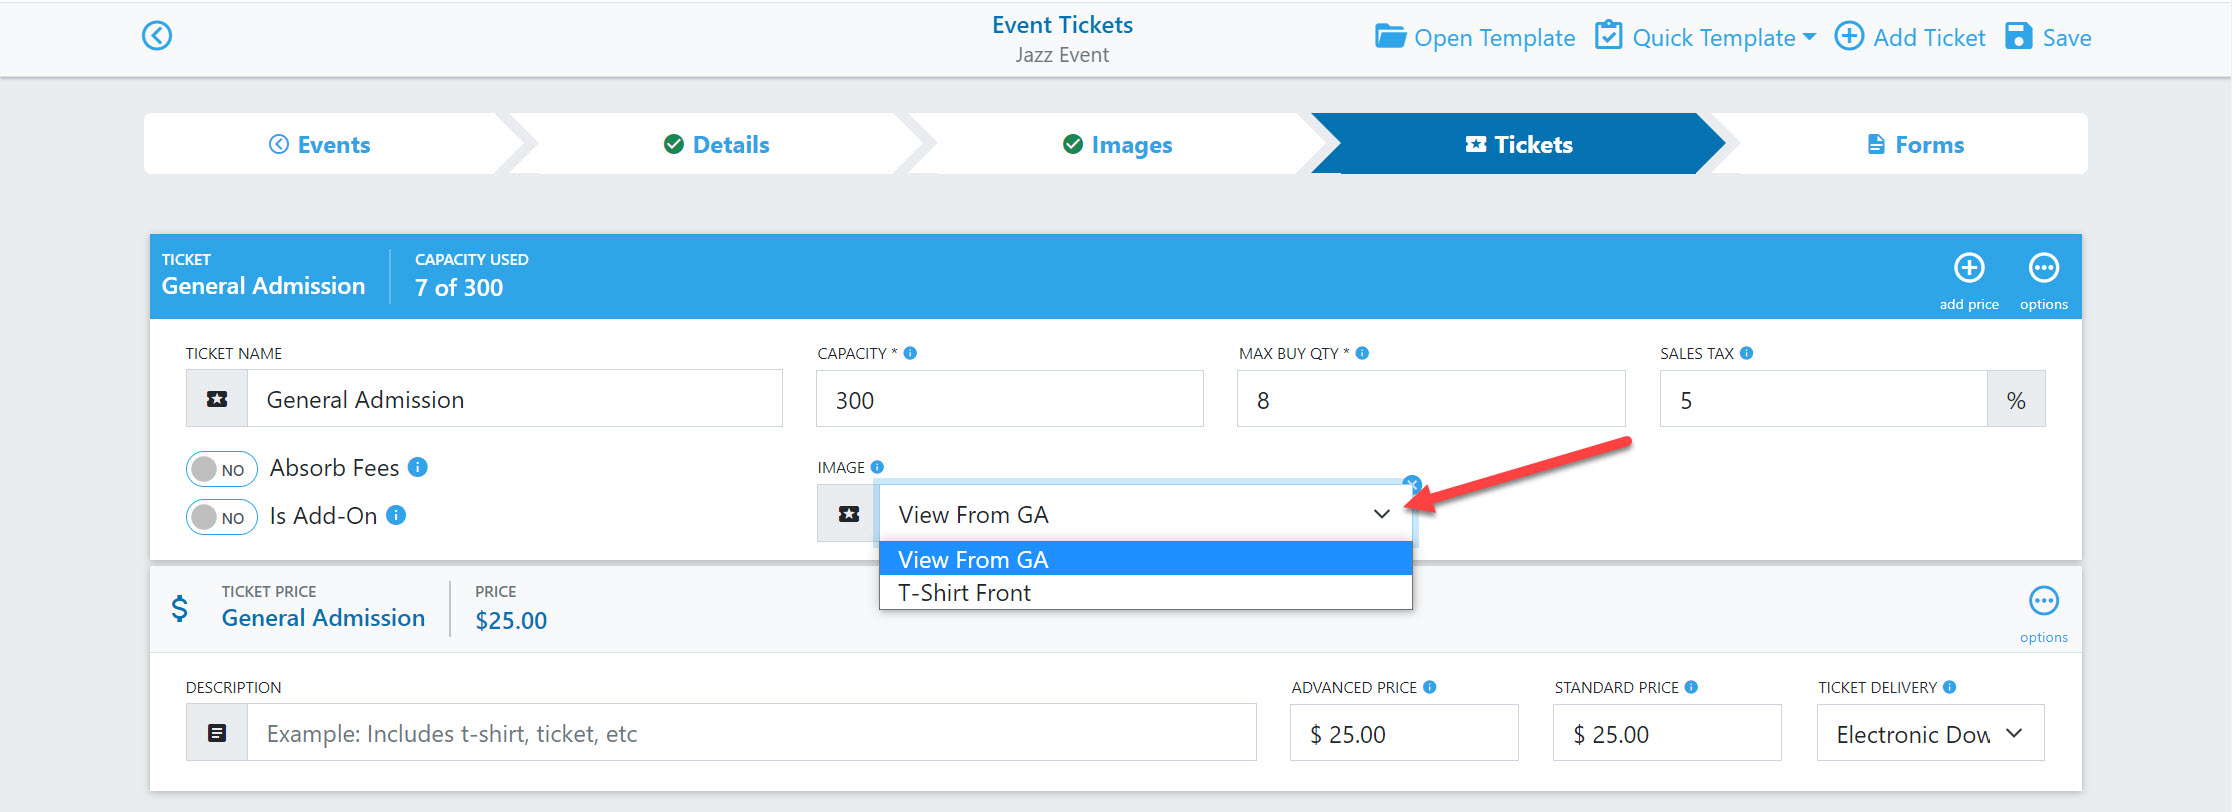
c. These images will be visible from the event ticket page.

Pro Tip
You’ll notice that images for Add-Ons display differently. For any Add-On items you have, associated images will appear as a thumbnail image that can be expanded.

