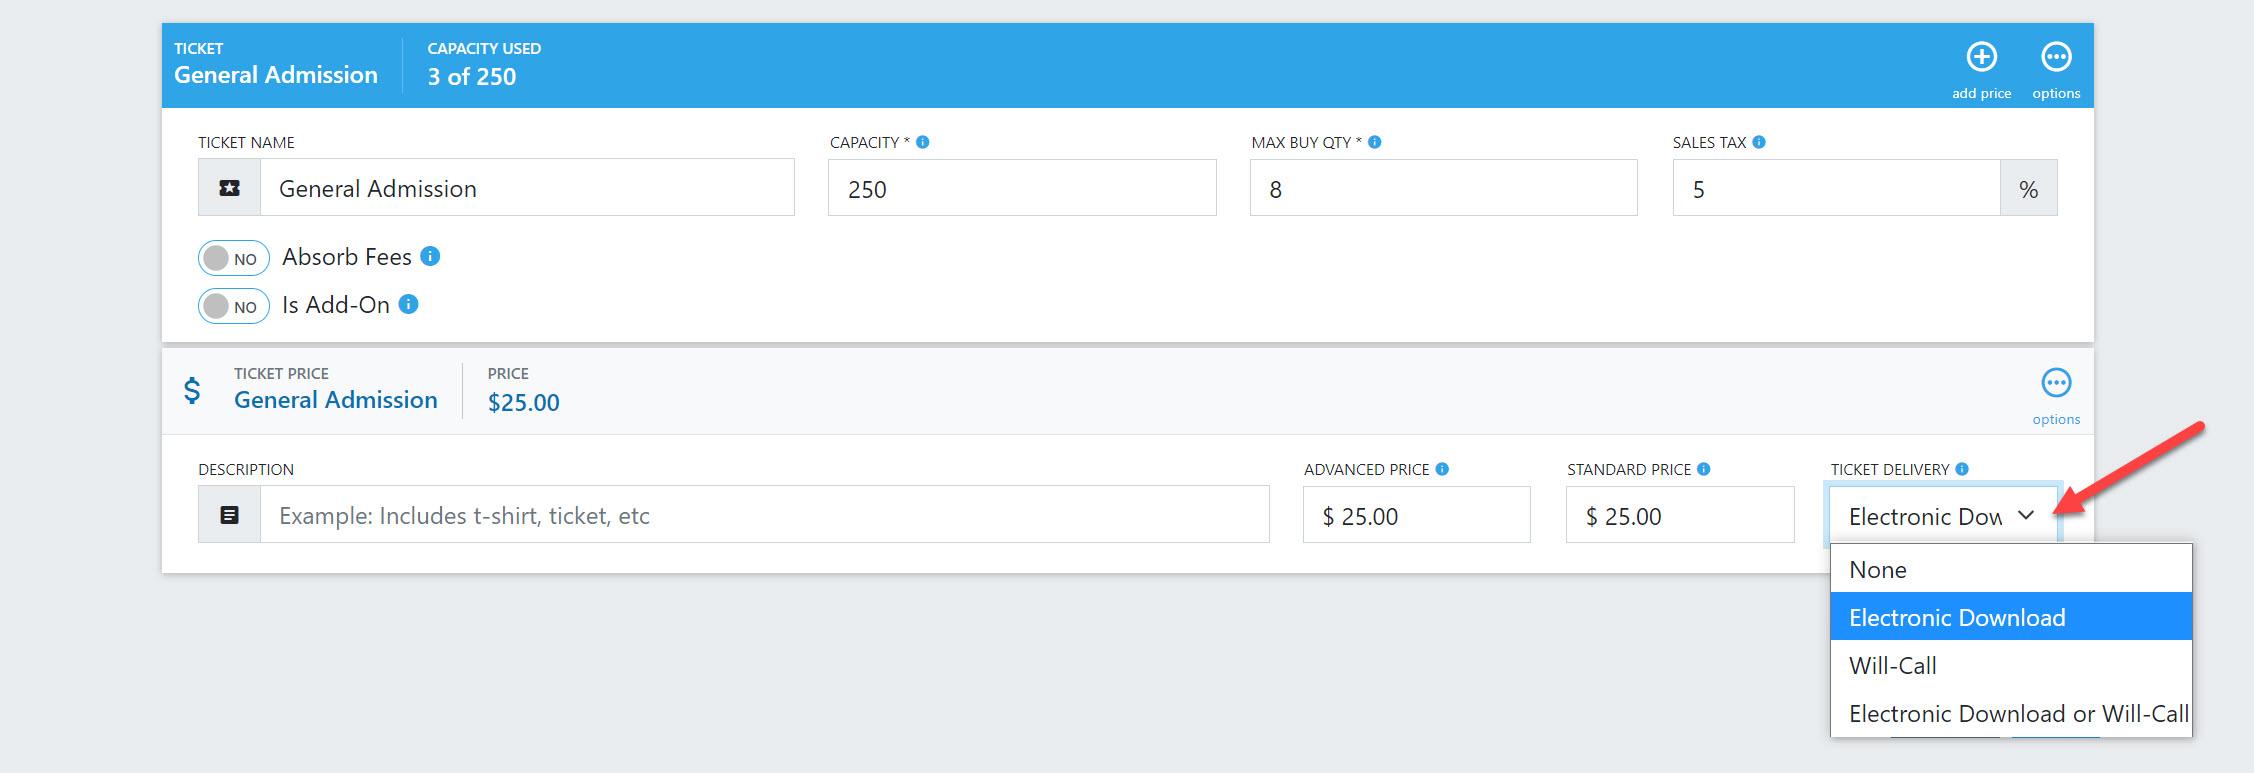
1. These options affect how your attendees will receive their tickets. You can now select from the following options on each ticket that you create:
a. None – Tickets will not be provided for electronic download.
1. You could use this option for virtual events or tickets that you don’t intend to scan, such as merchandise.
b. Electronic Download – This is the default option for in-person events.
1. This allows attendees to download and/or print their tickets.
c. Will-Call – Tickets will not be provided for electronic download.
1. You would use this option when you want attendees use a physical ticket or a VIP lanyard for entry.
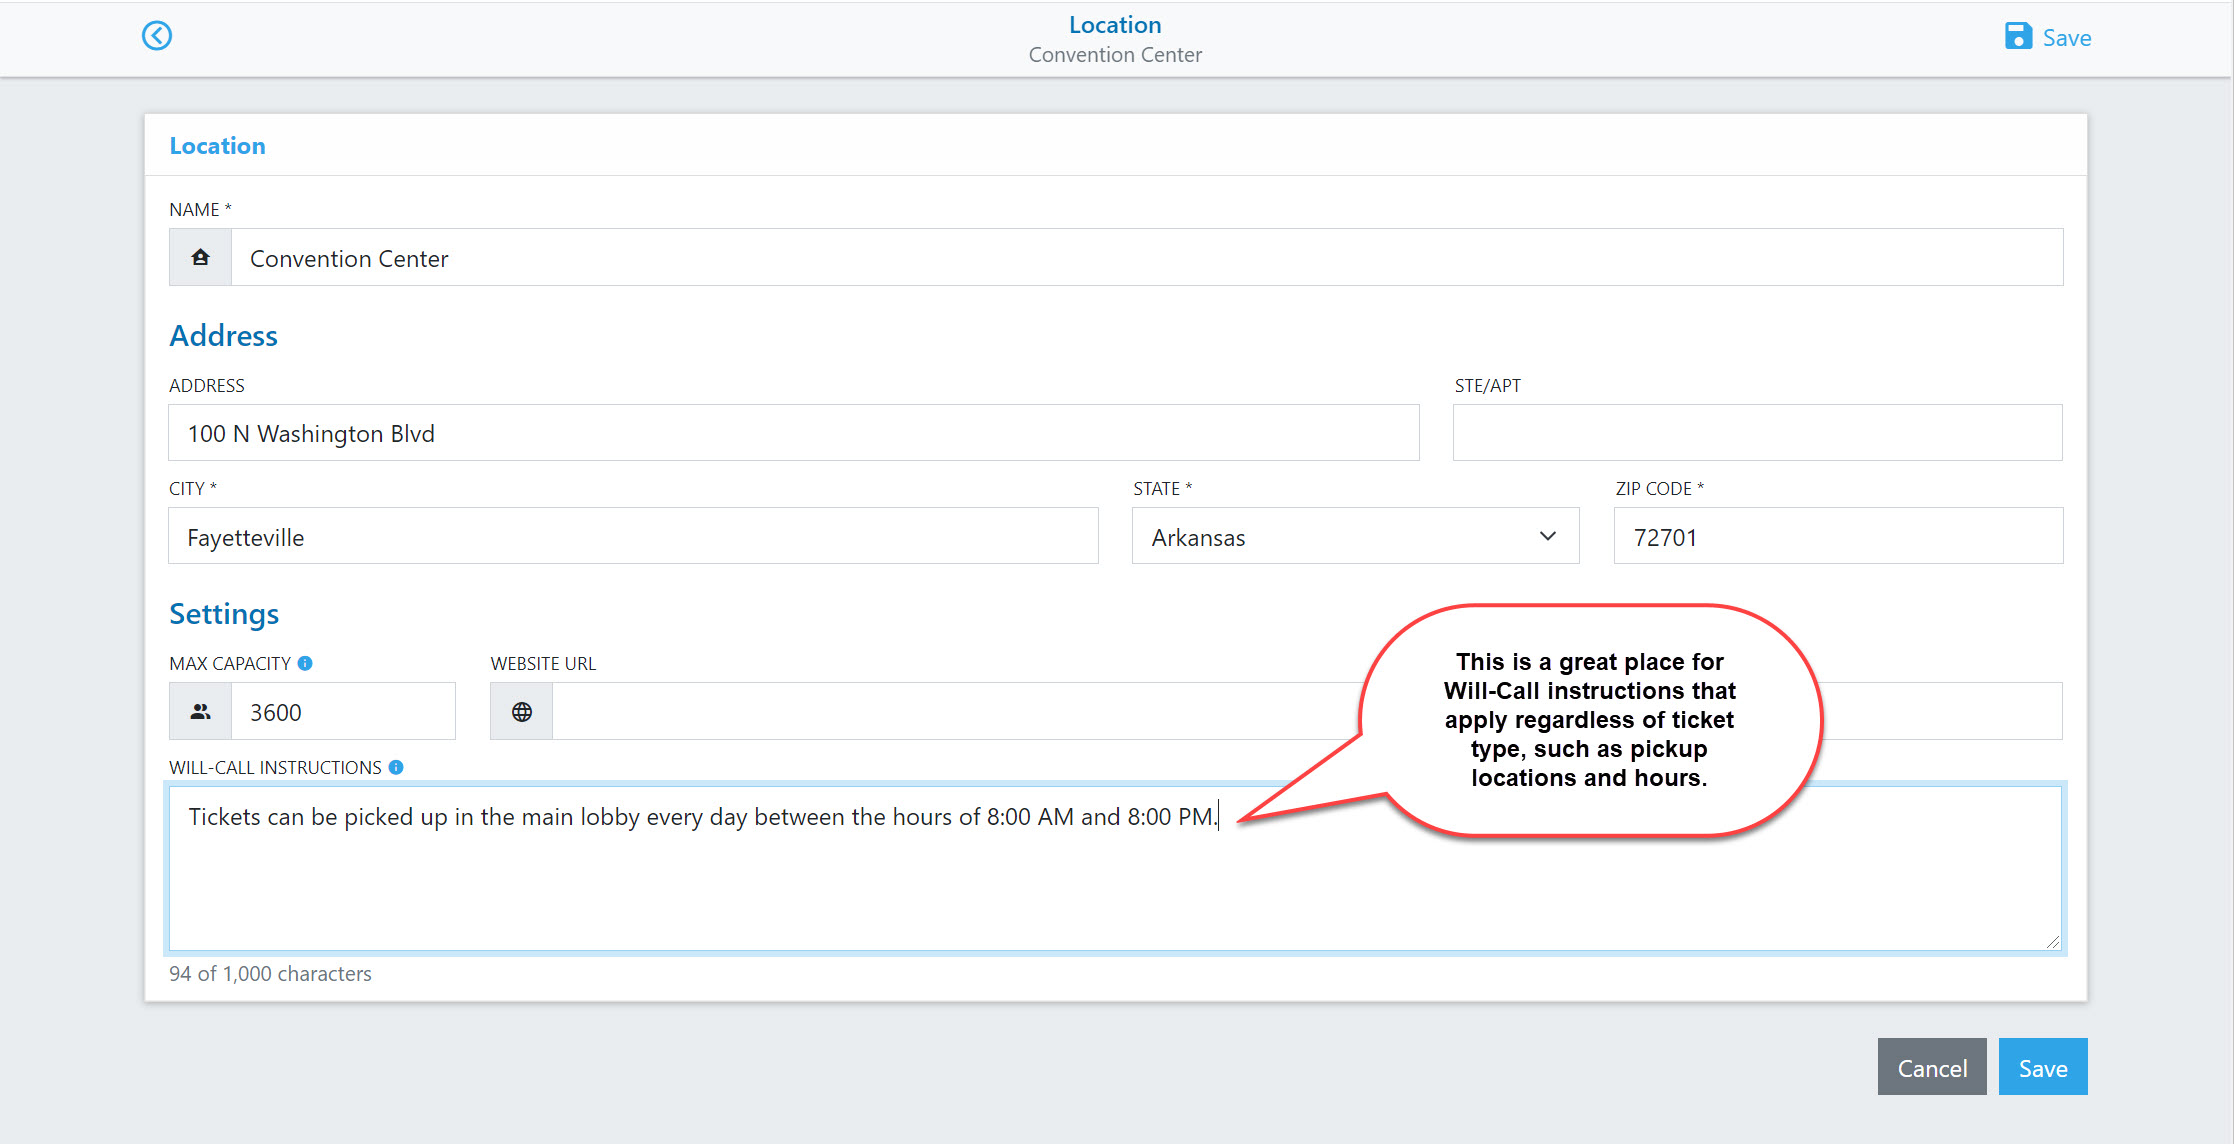
2. You can provide additional instructions regarding pickup sites/hours under the location details.
d. Electronic Download or Will-Call – Tickets will be available for electronic download.
1. This option gives you the flexibility of having a pickup option in addition to the electronic download method.

2. Will-Call instructions
a. You can add basic instructions for will-call pickup hours in the location screen.
b. This message will be visible on the confirmation screen and in the order confirmation email.
1. Click on the Locations icon.
2. Edit the location you want to update.


3. Custom message or instructions at the price level
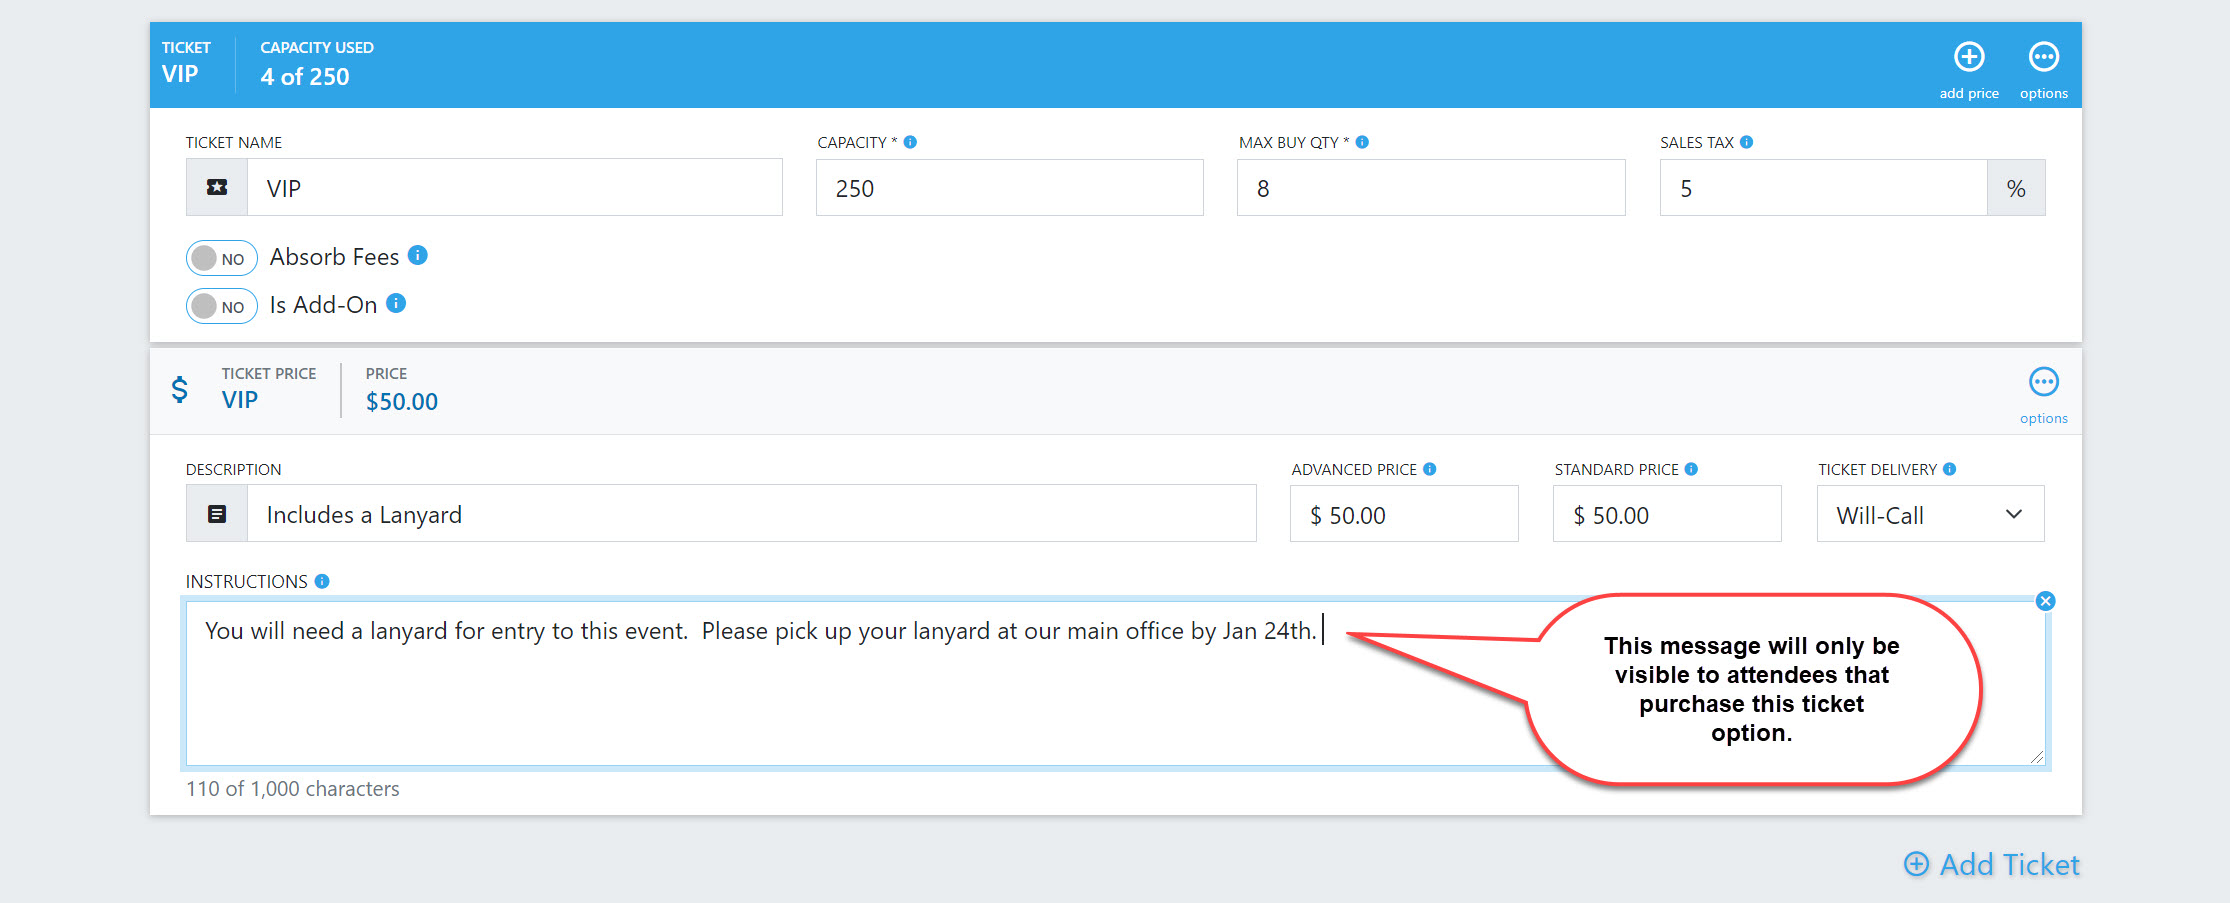
a. You can add instructions see after purchase that are unique to each price. This information will not be visible to the customer until the purchase is complete. This could be something like special VIP instructions for meet & greet timing and location. It could also include additional information regarding will-call tickets if they are ticket specific.
b. This message will be visible on the order confirmation screen and in the order confirmation email instructions at the price level.
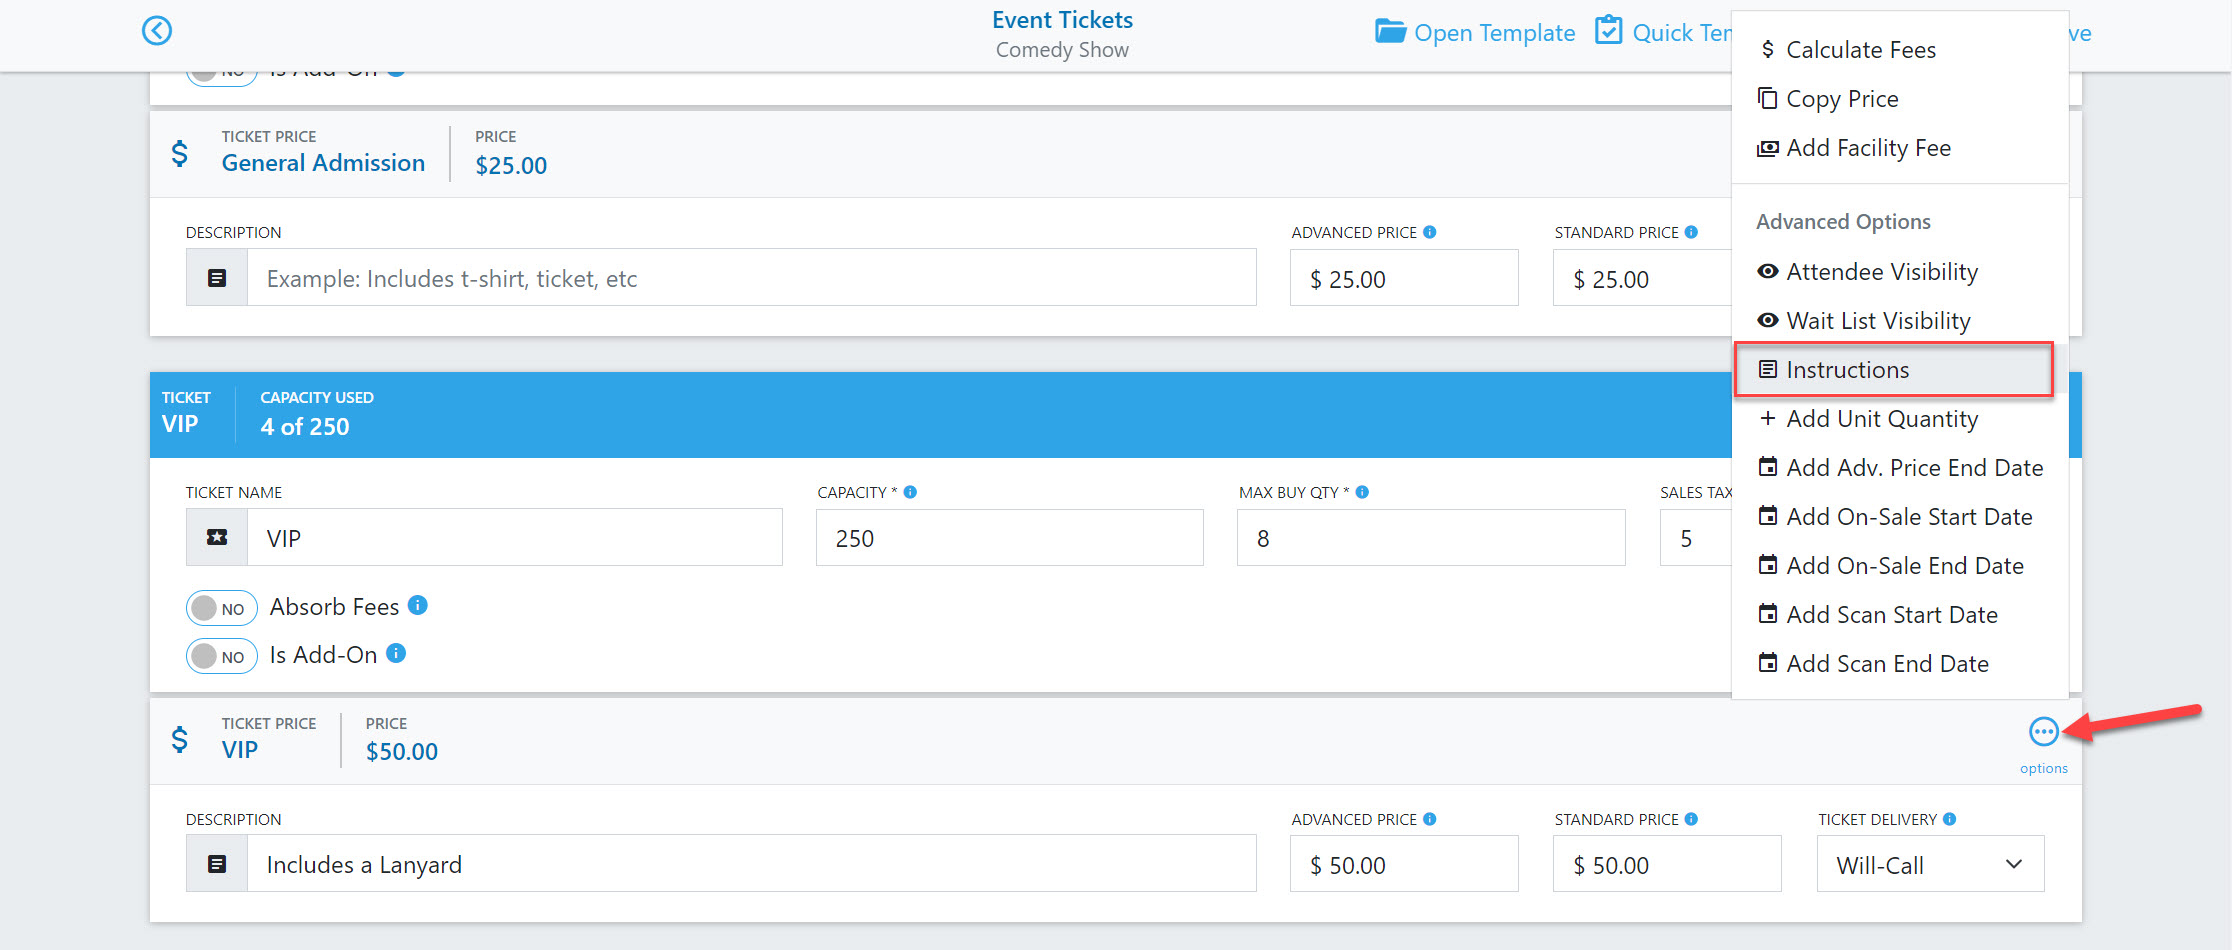
1. Go to the appropriate price level and click on Options.
2. Select Instructions and you will see a text box where you can write additional information.

