Setting up an event is really easy. In fact, many of the common defaults are already selected which makes your setup even easier.
1. From your Event Dashboard, select Add Event.

2. Depending on the Features you want for the event, you can select either the Basic or Enhanced option. You can always go back and change this later if needed.
3. Next, choose the event type and any relevant sub-types. This helps customers when they are browsing for events online.

4. Add setup details, such as the name of the Event and any special guests / performers. This option does not apply to all event types.
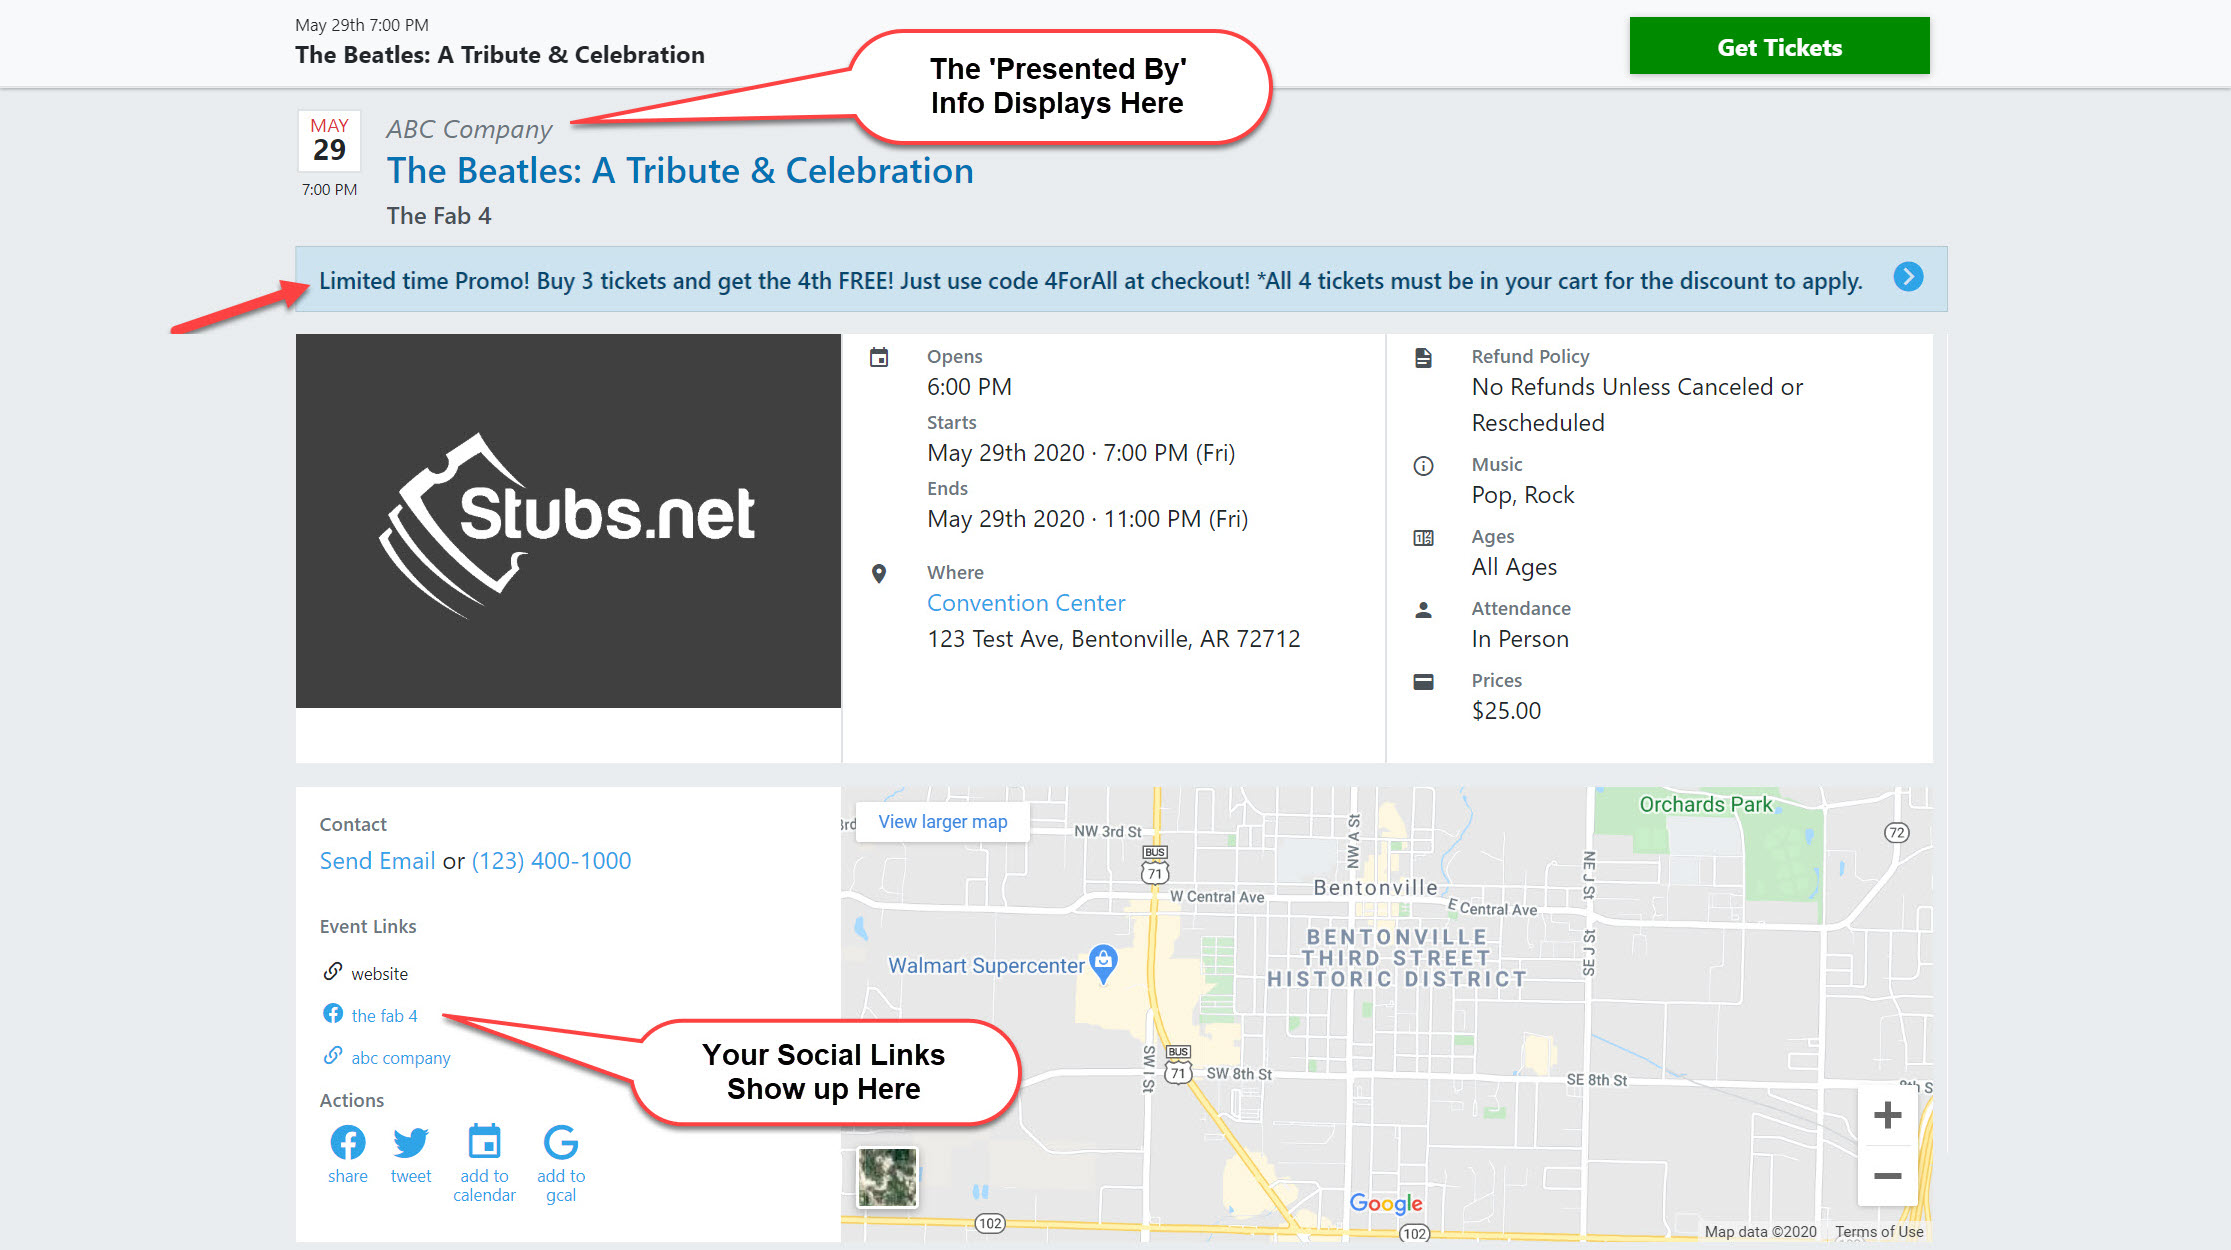
Contact Email & Phone Number: An email link and phone number will appear on your event so attendees can contact you with questions. Your actual email address will not be displayed - a contact form will be used to route questions to the email address. If you provide a phone number, however, that will be displayed to the attendee.
Refund Policy: The Refund Policy cannot be changed once the first ticket is sold.
Ticket Type: The Ticket Type can also be Registration or Reservation. These options are great for events like races or renting booth/vendor spaces.
Attendance Type: The Attendance Type can be In Person, Virtual, or Both.

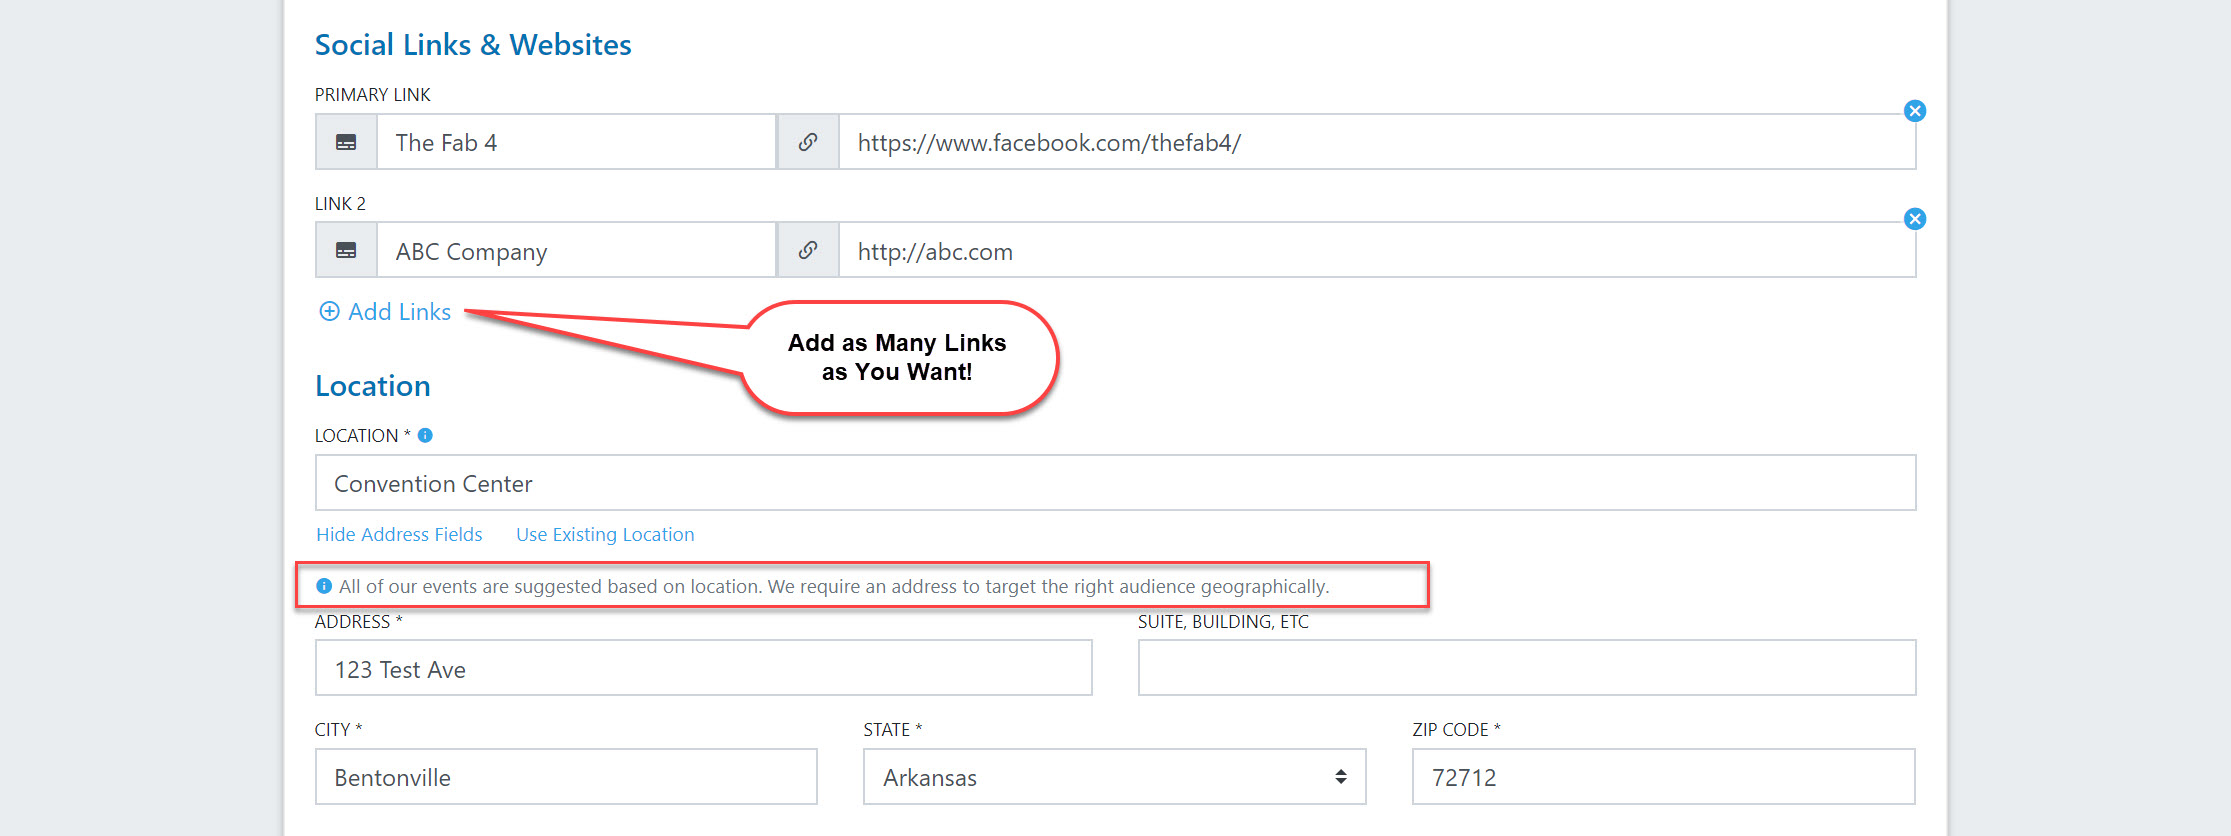
5. Social Links & Location Information - Create labels for the social sites you want to display on your event. You can add as many as you want.
Be sure to enter a full address for your event location. This will help us do geographic targeted advertising on our website, and it also helps your attendees locate the event. You'll notice a map on the event page.

6. Dates & Details - The date you enter under Visible to Public is when your event information will be viewable on Stubs.net (if the Event is Public). Tickets can go on sale at that time or later – you can specify this in the On Sale to Public field.
The Event Description you enter here will appear on your event information page. Provide enough details so people will want to attend your event and so they will know what to expect!

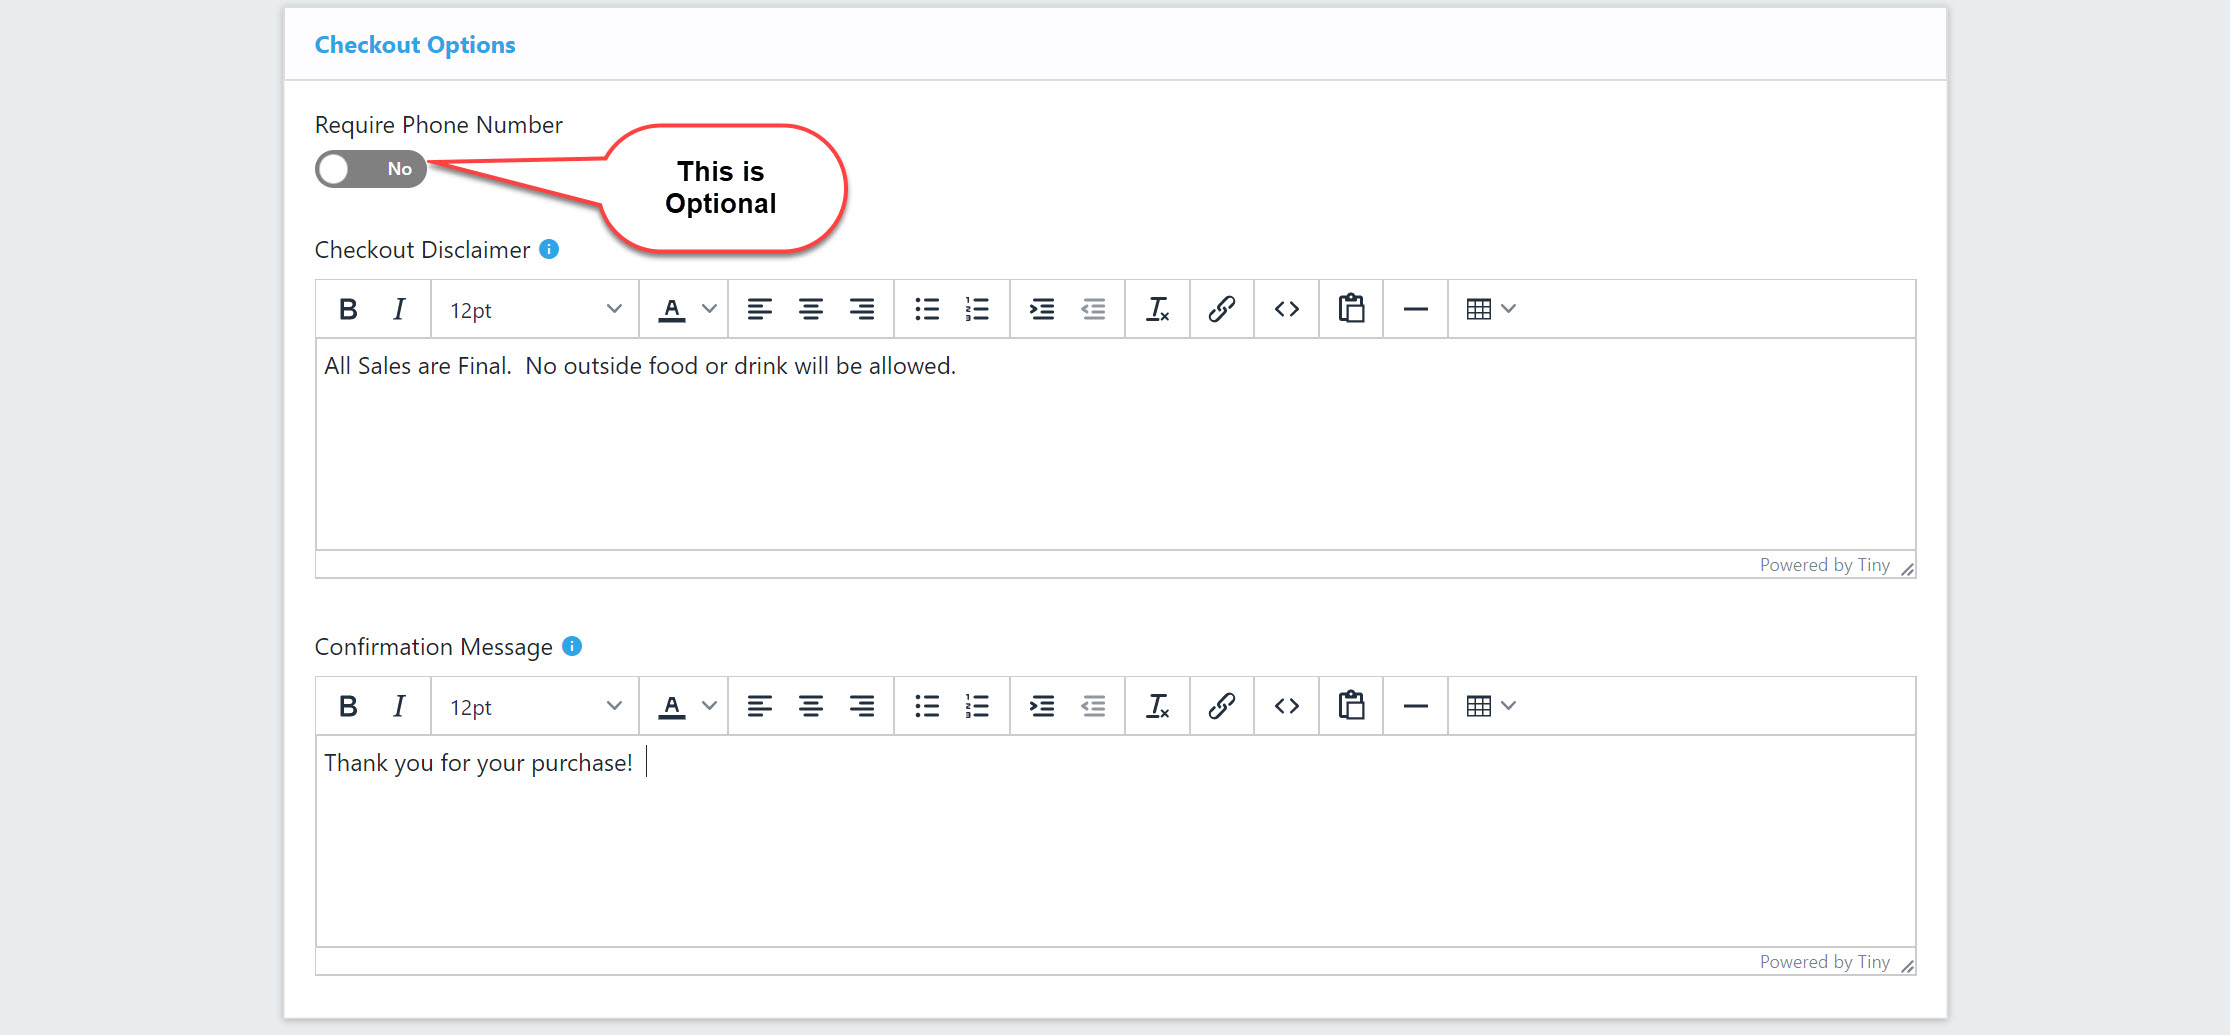
7. Complete the checkout options - You have the option to require a phone number at the time of purchase. Attendees are always required to provide first name, last name, billing address, and email address.
Checkout Disclaimer: Anything entered here must be agreed to by the attendee at the time of purchase.
Confirmation Message: Customers will receive this in their confirmation email. You may want to include additional event information such as parking guidelines, what they can / cannot bring, etc.
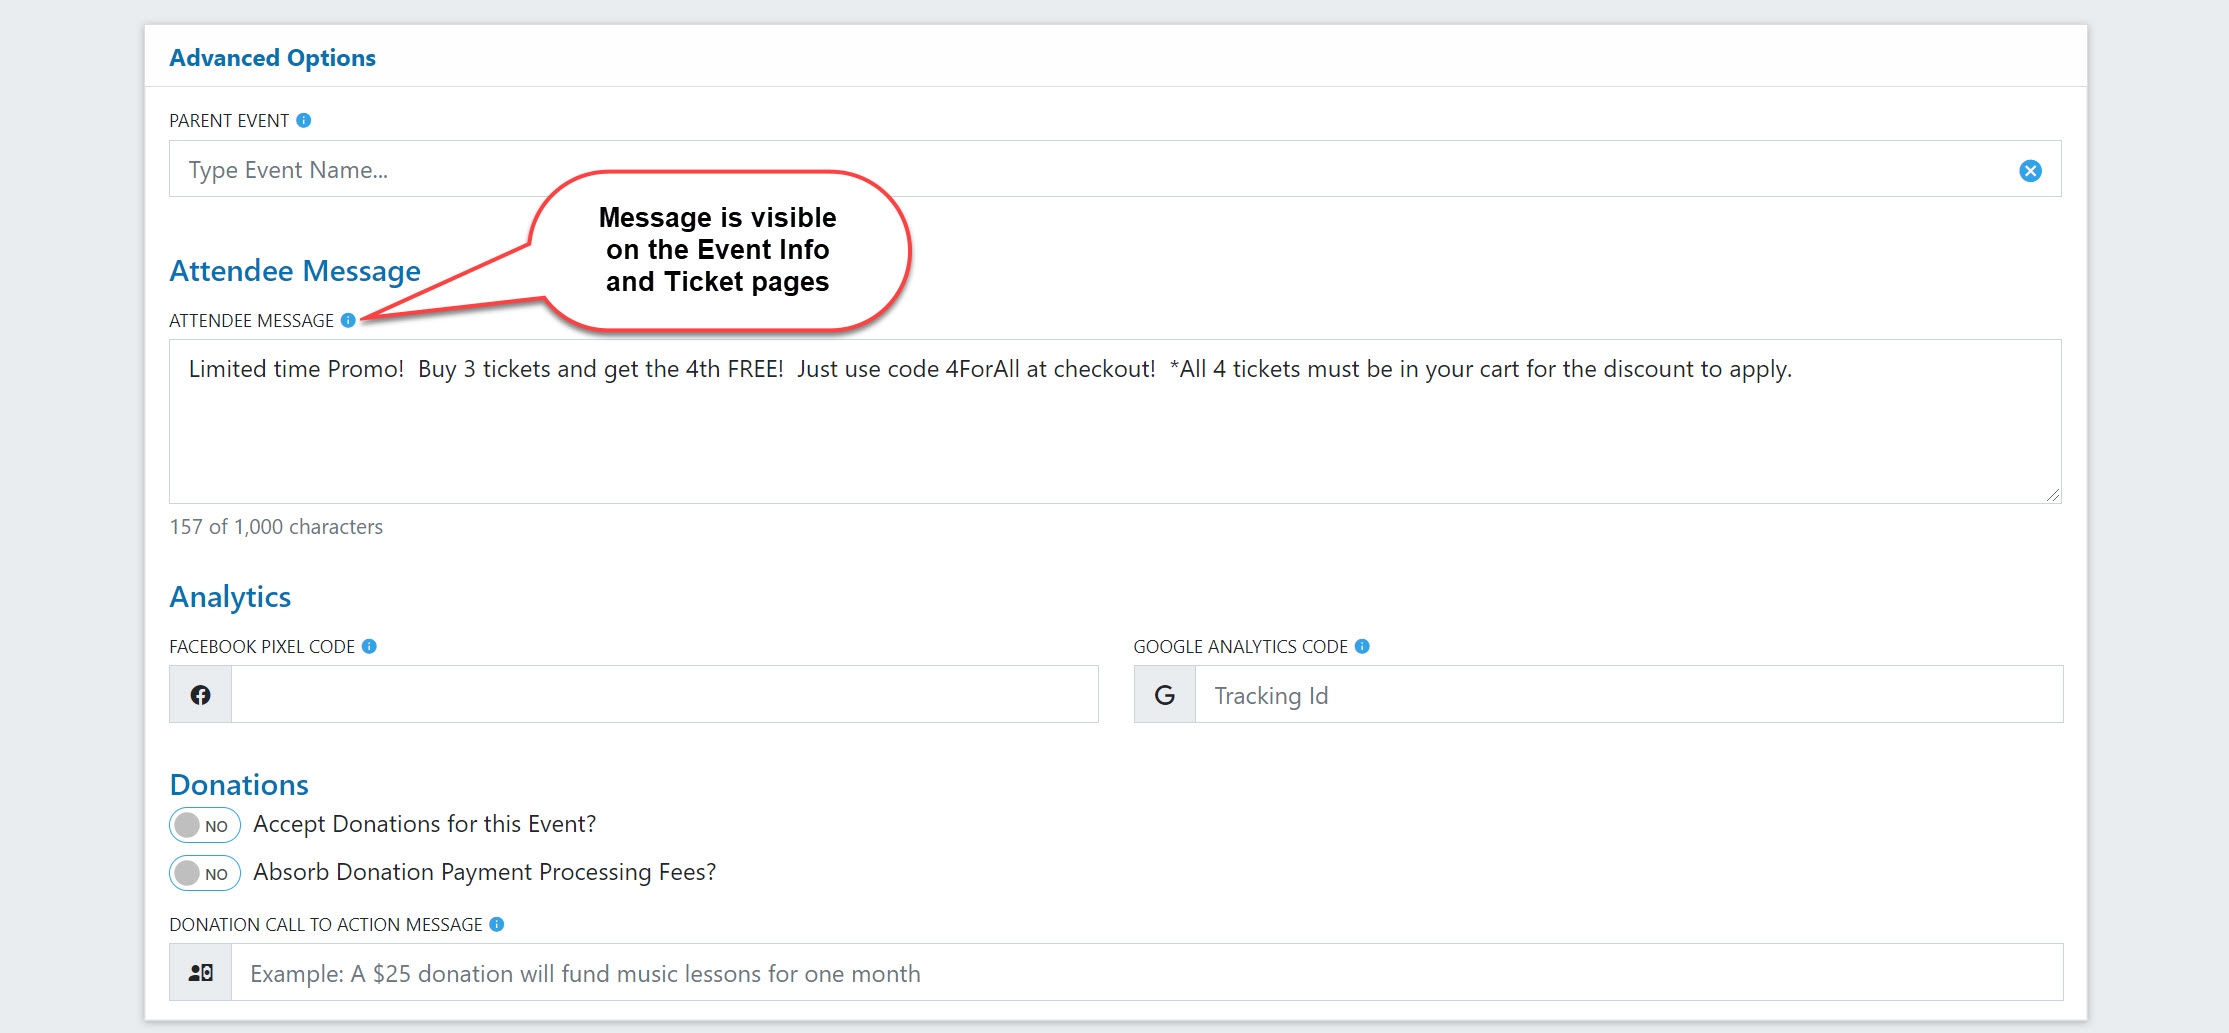
Attendee Message: This is located under Advanced Options and allows you to create announcements that are event specific. This is a great way to communicate special promotions, discounts, or other important information.


