Why would I Use the Influencer Campaign feature?
- Track sales or donations generated by specific individuals or teams
- Set sales goals for individuals or teams and track their progress
- Help crowd-source your fundraising or advertising efforts
As you can see, there are many ways to use this feature! First, we will cover how to create your campaign. Then we will add Influencers to that campaign.
Create an Influencer Campaign
- To create a Campaign, click on the icon from your Event Dashboard and then select Add Campaign.

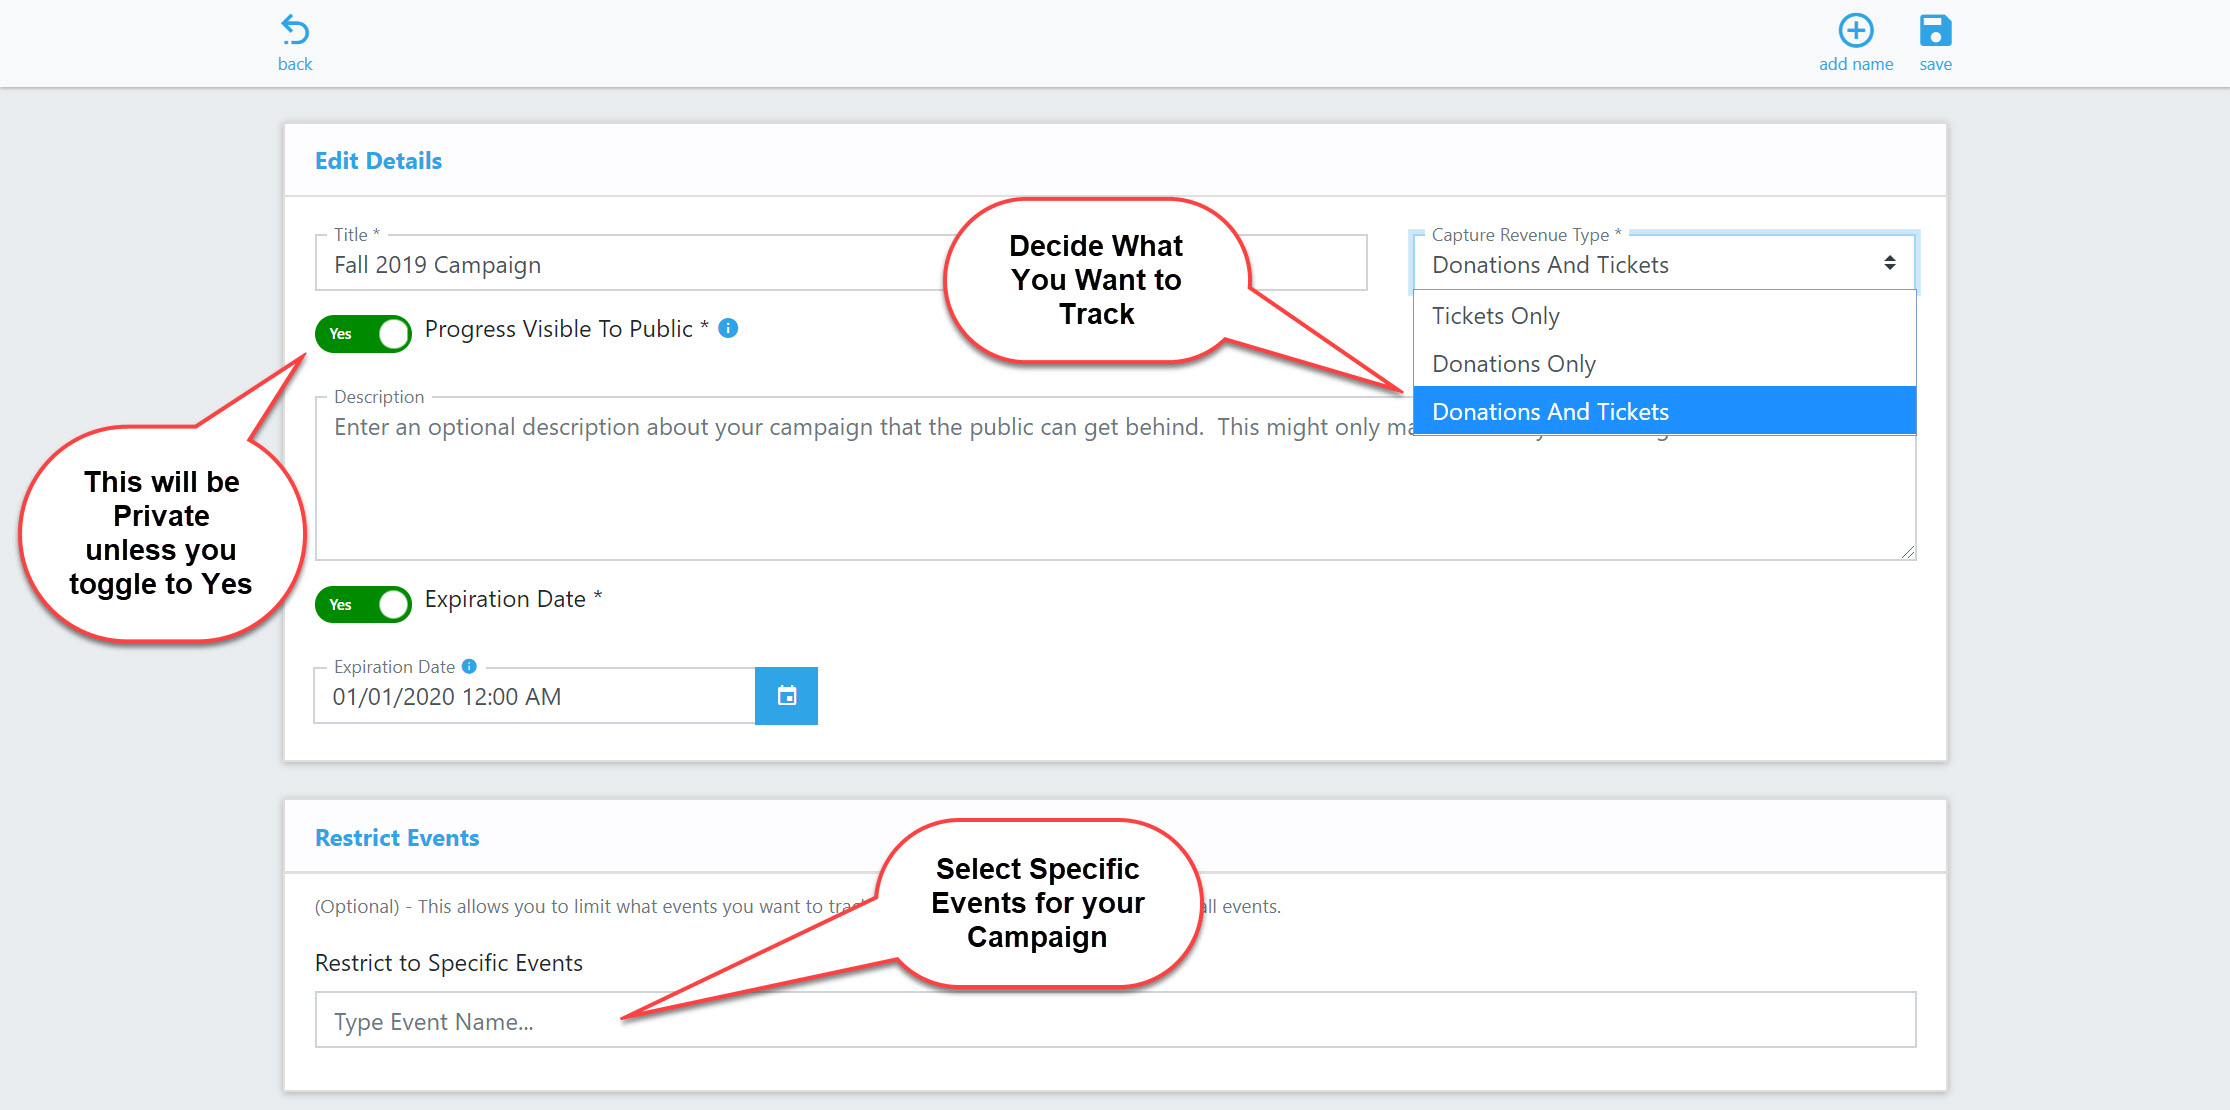
- Name your Campaign and determine if you want to track ticket sales or donations (or both).
- Determine if you want a Private or Public Campaign.
Pro TipYour Campaign Progress will be Private unless you opt to make it Public.
For Public Campaigns, you can write a short description that explains what you are doing so it's visible to your purchasers; this is especially helpful for fundraising.

- Select Events that will qualify for your Campaign.
Pro TipCampaigns can be limited to specific events or may include multiple events. By default, all of your events will be included in each Campaign you create.
Campaigns will run indefinitely unless you select an expiration date.
Setup Your Influencers
- Enter a name and email for each individual or team that you want to track.
Pro TipYou can add as many teams or individual influencers as you want. An organization can be an Influencer as well, but you will need to specify one email address to represent the group.
The Influencer’s email address can be used to send automated sales notifications (see Notifications).
- Click on Options to set ticket or donation level goals (optional). These can be edited or removed at any time.
- Save your campaign once you have entered all of your Influencer information. Your campaign is complete!
 Pro Tip
After saving the campaign, your Influencers will each receive an automated email welcoming them to the program. This email will include the unique purchase links that will be used to track their activities.
Sales Tracking & Reporting
- From your Event Dashboard, select the Influencer Campaign icon.
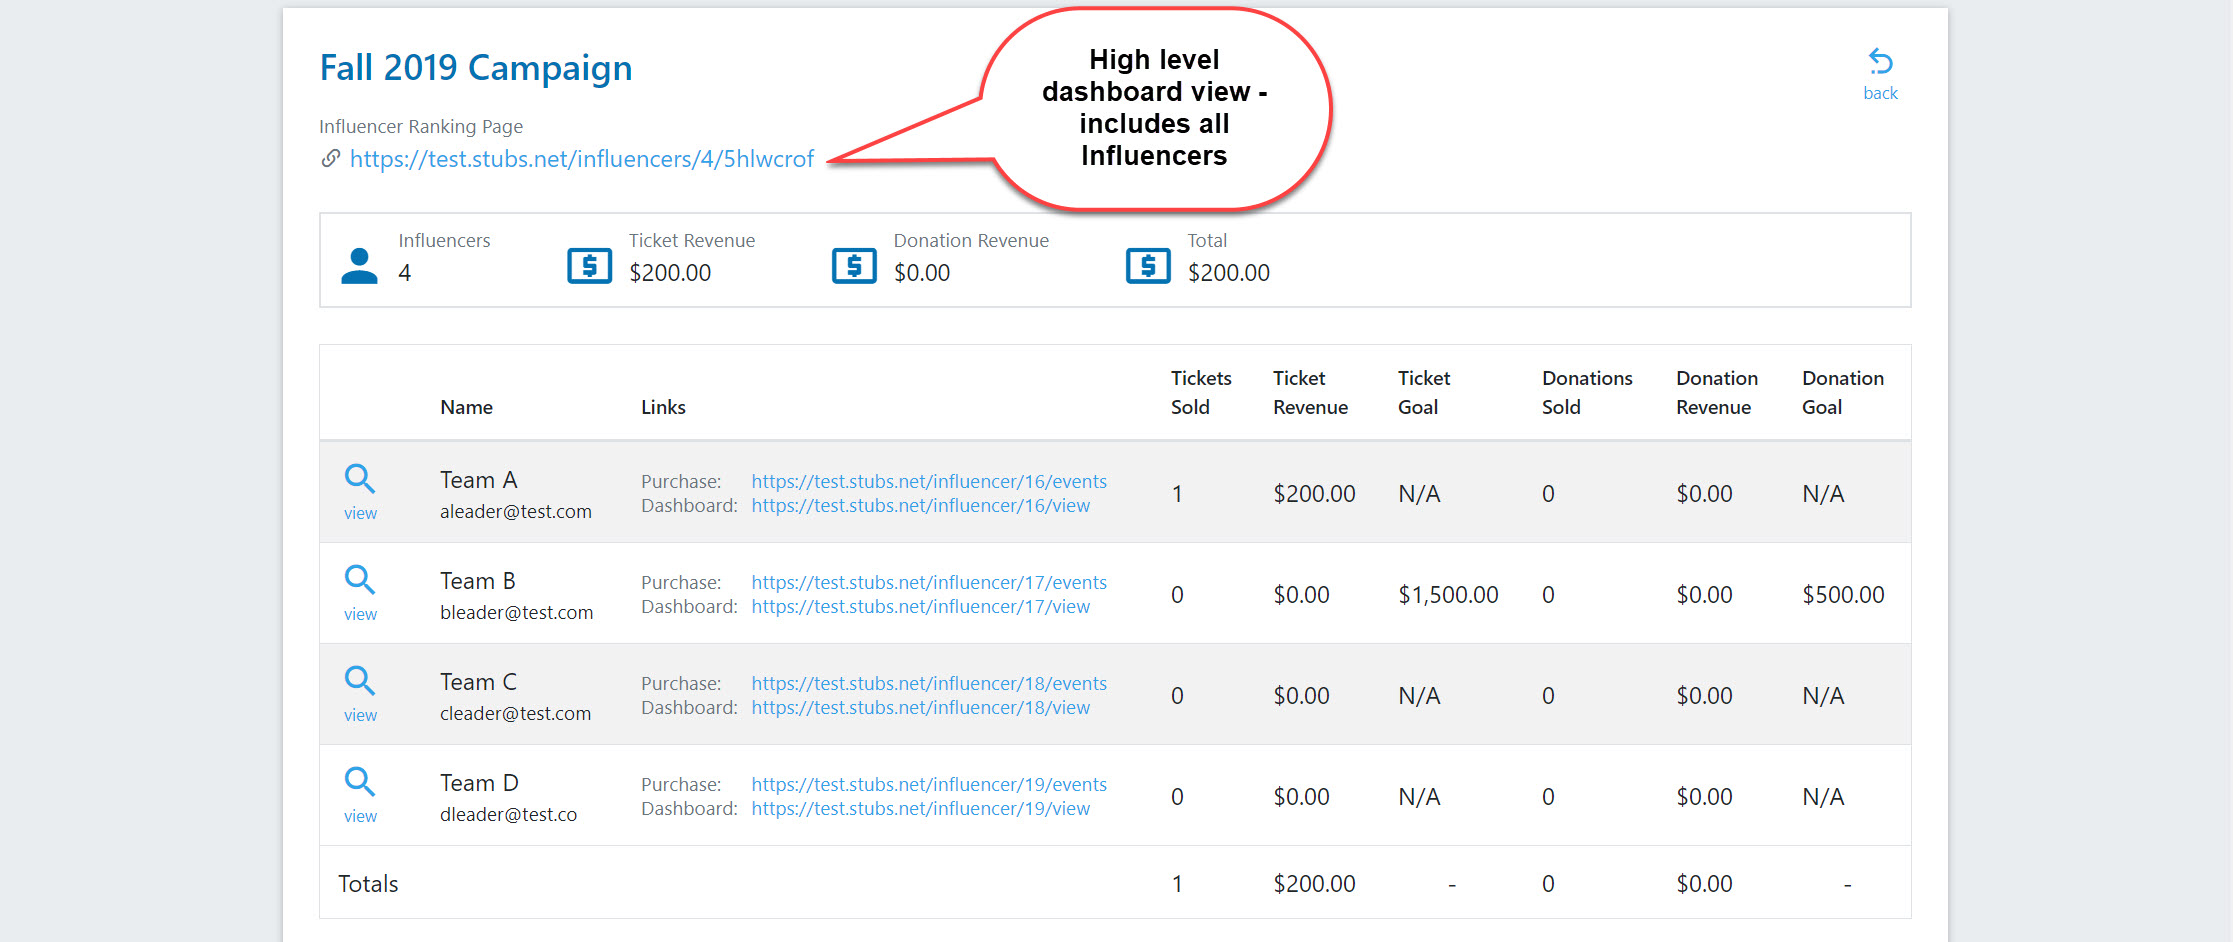
- Select View to see your tracking and reporting options. This will show you the # of influencers in your campaign and your overall sales activity.

- Locate the purchase links next to each Influencer. Sales must be made using these links for each Influencer to receive credit.
Pro Tip
As an event organizer, you also have the ability to select an Influencer when processing orders through the Box Office. This feature works with both cash and credit card purchases.
Note: If you made your Campaign public, sales information can be shared using the Influencer Dashboard link (directly below each purchase link). This link will only be generated if you selected to make the information public.
